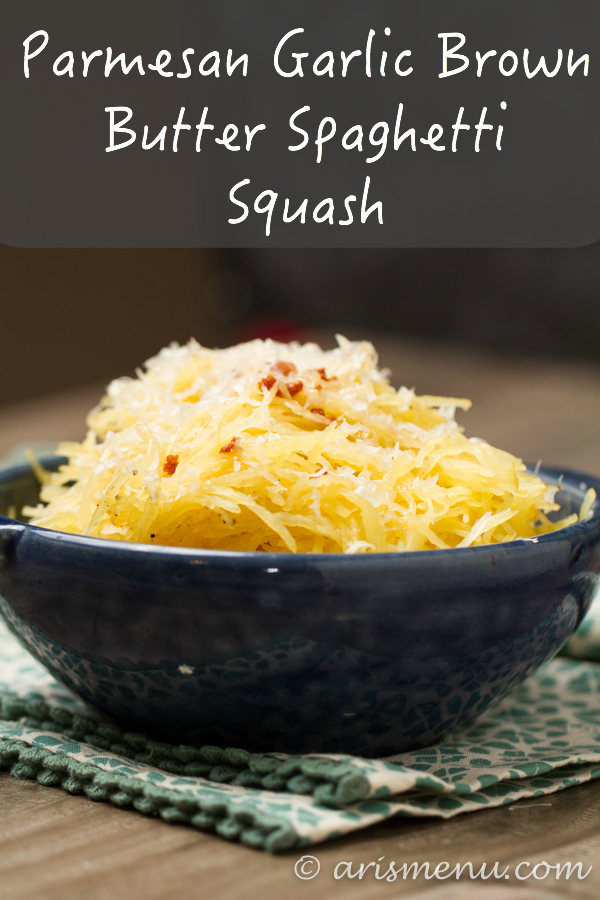
Bold, rich, nutty parmesan garlic brown butter spaghetti squash is the perfect comforting side dish. Tons of nutty, garlic-y flavor, low carb, gluten-free, and just 4 ingredients (+ salt and pepper)!
Welcome to the last week of my twenties. So I’m totally that person that is obsessed with my birthday. Like, on my whiteboard at school, there has been a countdown for about two weeks. I love to be celebrated, and I shamelessly love to be the center of attention. I feel like as long as I don’t become one of those people that needs any kind of attention (you know, the poor me, I’ll act crazy so people notice me types?), I refuse to become someone who feels ashamed of loving attention. Why do you think I majored in musical theatre? 😉
But have I mentioned how I’m spending the day of the big 3-0? Oh, you know, waking up at 3:30 am to leave on a 4am bus to a musical theatre competition in California with my students. I know. Luckily I love them, and I know it will be a fun trip, but I’d rather be drinking multiple old fashioneds with Steve and having a super sentimental birthday dinner at my favorite restaurant.
Ooooh, orrrrrr eating a big steak (Steve is the grill master) and a huge pile of this spaghetti squash at home. Because this dish is so freaking good, it is definitely birthday dinner worthy. In fact, it was totally fight over the leftovers worthy, and goes down in history as a tie for my favorite thing I have ever made with spaghetti squash.

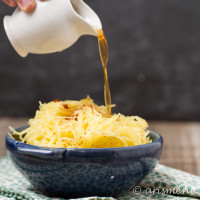
I know, I know, with butter in the title and shots of literally pouring butter onto the food, this hardly seems like a healthy recipe, but honestly for the amount of butter per serving, it’s really not too shabby, and it is so, so, so worth it. The flavor of browned butter is so bold that a little bit goes a long way. It doesn’t hurt that the garlic is cooked in the browned butter. I diiiiie.
This was my first time using browned butter in a savory recipe. Actually, I just used it for the first time, like at all, a couple of months ago and, well, now I get it. As a recovering butter hater, let me just say: It’s totally worth it.
So dive in. Embrace the browned butter. It comes with a vegetable. 😉
- 1 extra large (or 2 small) spaghetti squash, halved, seeded and scraped
- 1 tablespoon olive oil
- salt and pepper
- 1 stick (1/2 cup) unsalted butter
- 2 cloves garlic, finely minced
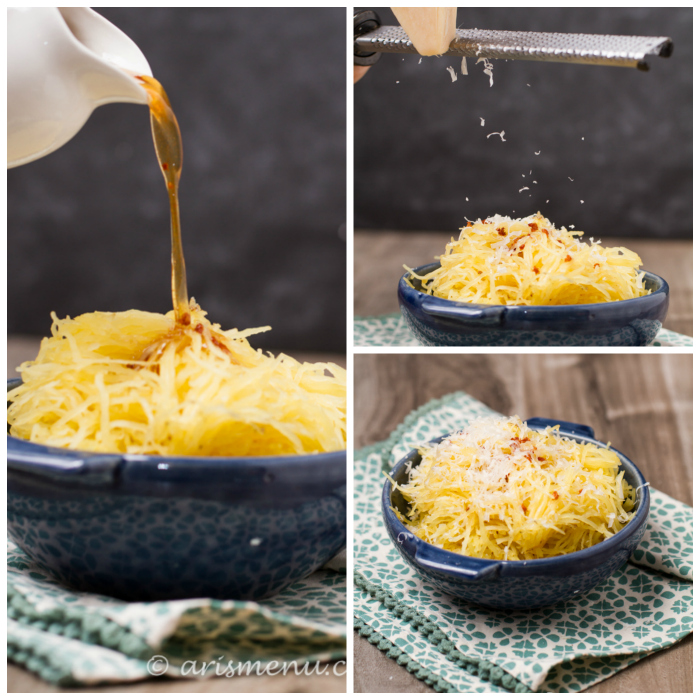
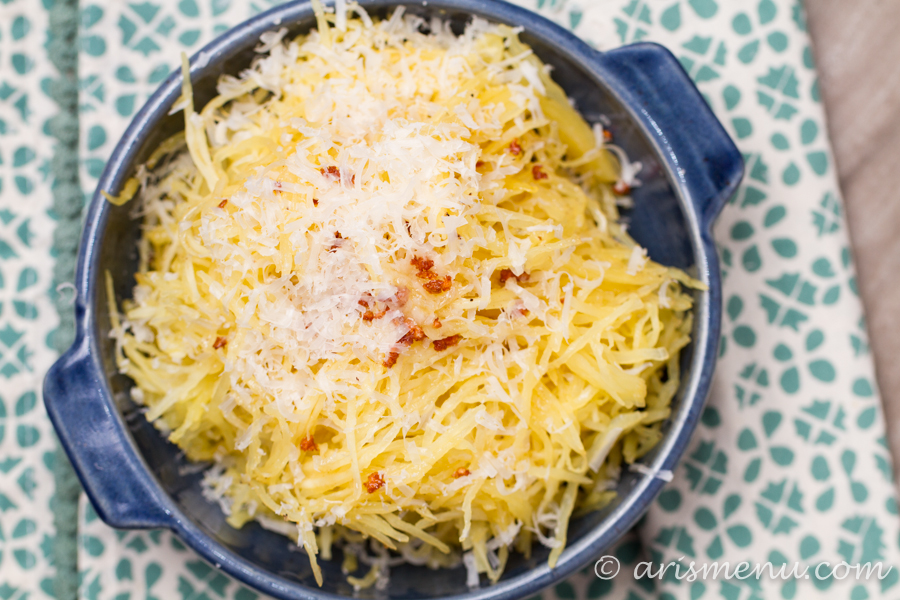
- 1/2 cup freshly grated parmesan cheese
- Preheat oven to 400. Rub spaghetti squash with olive oil and season with a generous pinch of salt and pepper. Roast until fork tender–the spaghetti squash should easily come out when scraped with a fork, about 40-60 minutes, depending on size.
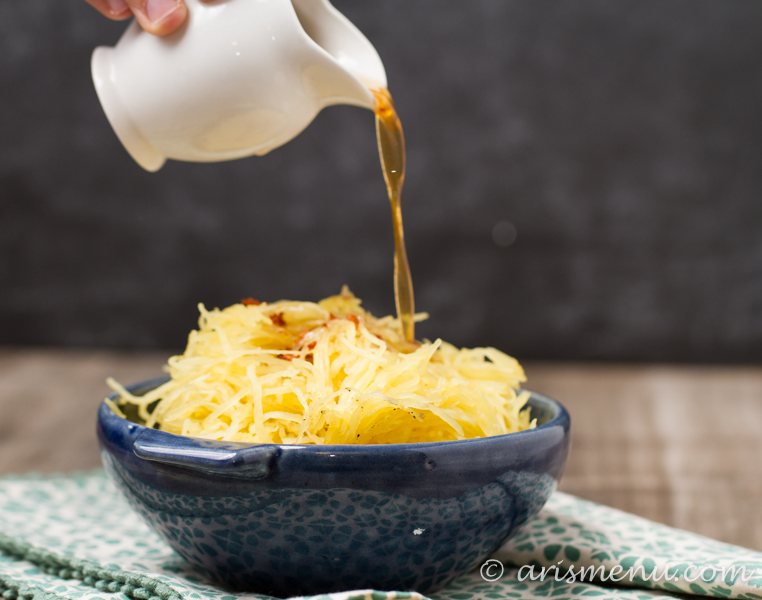
- To brown the butter melt in a medium pan over medium heat. Once butter is melted add garlic. Whisk constantly. The butter will start to foam first, then develop golden brown specs. Once you see the brown specs, turn off the heat and continue to whisk for an other 30 seconds, until butter is a nice amber color. Place on a cool surface to avoid continuing to cook and burning. The butter can burn very easily.
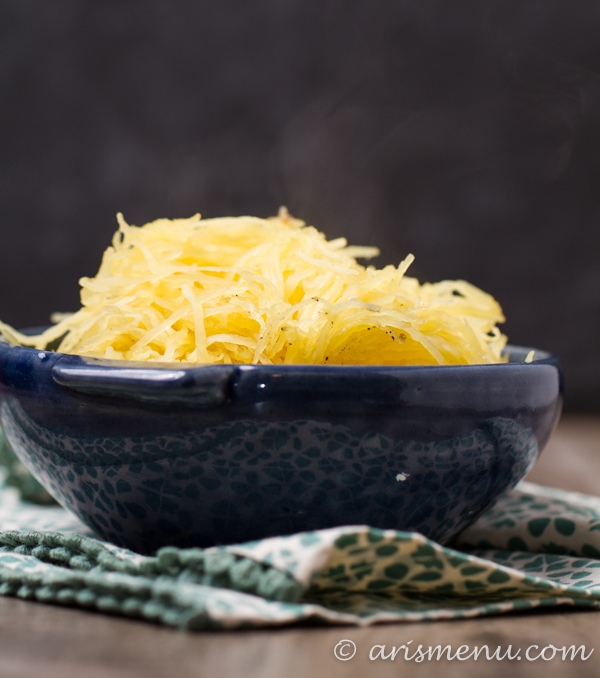
- Once spaghetti squash has finished cooking, remove the inner flesh (the spaghetti-like part) and place in a large bowl. Toss with browned butter (I recommend not adding it all at once–you may not need it all), and a generous pinch of salt and pepper. Serve topped with freshly grated parmesan cheese. Leftovers may be refrigerated in an airtight container for up to one week.