• Going Out
    • Phx Restaurants
    • How To Order At Starbucks
  • Running
    • My Running Story
    • Race Calendar
    • Race Recaps & Results
  • Blogroll
  • Bucket List
  • Video

Ari's Menu

Little changes making a big difference.

  • Home
  • Recipes
  • Weight Loss
    • My Story
    • Common Swaps
  • Who’s Who
  • Contact
    • Policies & Disclosure
  • Press

Drink & Dish: Cafe Au Lait Cupcakes

February 28, 2014 · by Ari · 31 Comments

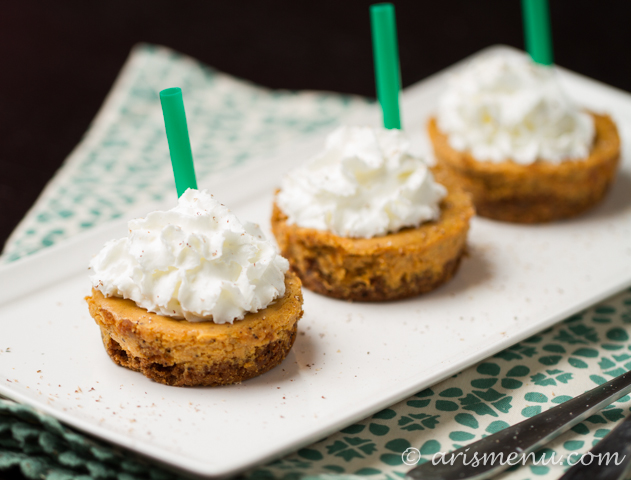
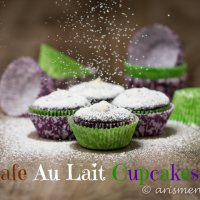
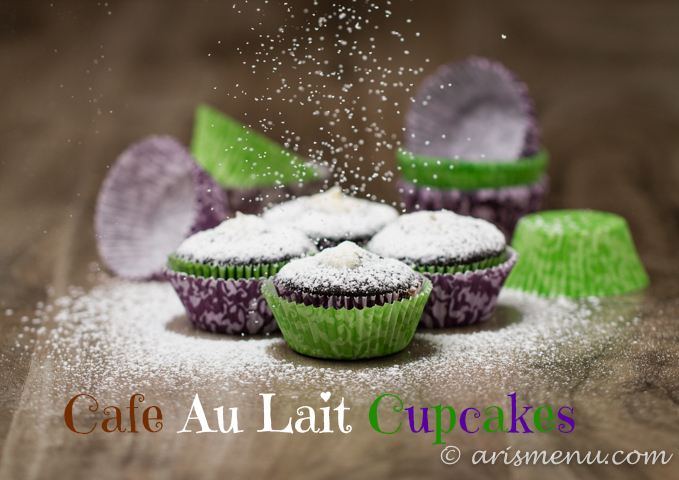
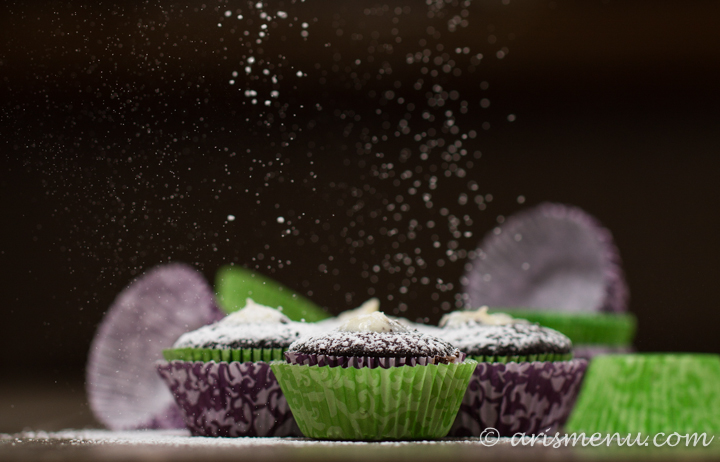
Ultra soft gluten-free cafe au lait cupcakes–espresso cupcakes with a to die for cream filling. A classic cafe au lait re-invented as a fun, festive and delicious cupcake.

Cafe Au Lait Cupcakes: Ultra soft espresso cupcakes with a to die for cream filling

Have any of you guys ever been to New Orleans for Mardi Gras? Personally, it sounds about as appealing as being in times square on New Years. Meaning…not…

Cafe Au Lait Cupcakes Ultra soft espresso cupcakes with a to die for cream filling

I’ve actually only been to New Orleans once, but I fell so in love with it. Steve and I took an anniversary trip there about a year ago and we had such an amazing time. It is probably one of my favorite vacations of all time, and I can’t wait to go back.

Cafe Au Lait Cupcakes Ultra soft espresso cupcakes with a to die for cream filling

In fact, I’m already planning to go back. Next year I turn *gulp* 30, and I’m already planning to meet with this girl to meet up in New Orleans to celebrate both of our birthdays. There is so much to do. Especially if you love food, which…ummmm obviously.

Cafe Au Lait Cupcakes Ultra soft espresso cupcakes with a to die for cream filling

As far as Mardi Gras, though? I think I prefer to celebrate from afar. I’ve become that old person that actually rolls their eyes at drunk college kids. I know. I’ve very quickly become one of those crotchety old folk types that goes to bed at 9pm and gets annoyed with people who are sloppy drunk. Who am I kidding? I am pretty sure I’ve always been that person inside.

Cafe Au Lait Cupcakes Ultra soft espresso cupcakes with a to die for cream filling

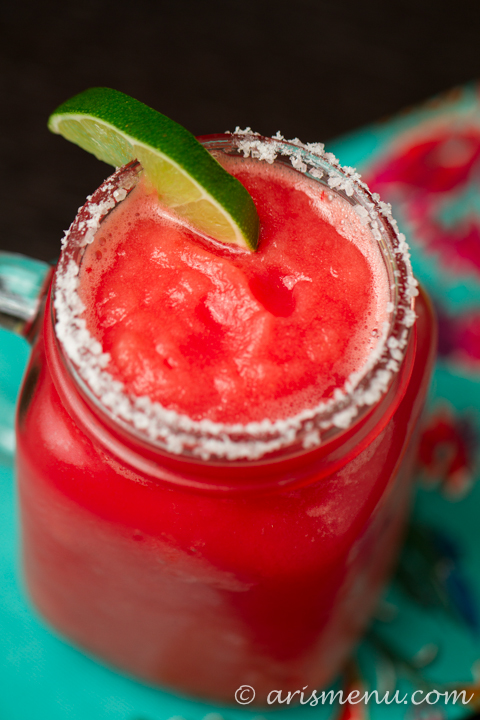
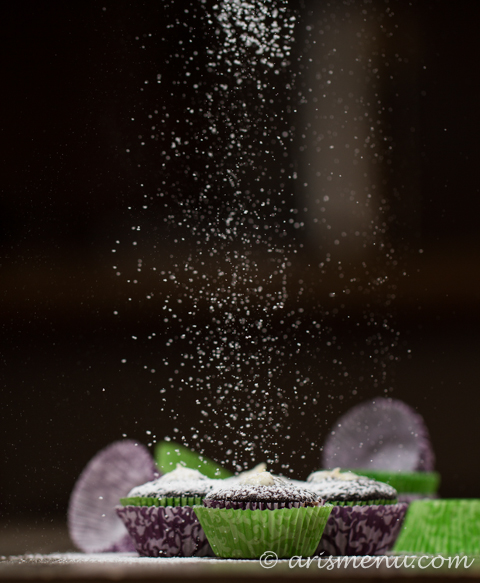
So after a little break, Drink & Dish is back! If you hadn’t noticed, the theme is MARDI GRAS! A cafe au lait is probably the most famous non alcoholic drink in New Orleans, and a must have to go alongside a freshly friend beignet. And you must have the beignets. Covered with so much powdered sugar that your entire outfit ends up in a covered in sugary dust. You can’t leave without that combination, I promise you. Also, you have to have a hurricane! It is pretty much the official drink of New Orleans, and Nicole’s totally lives up to the fame!


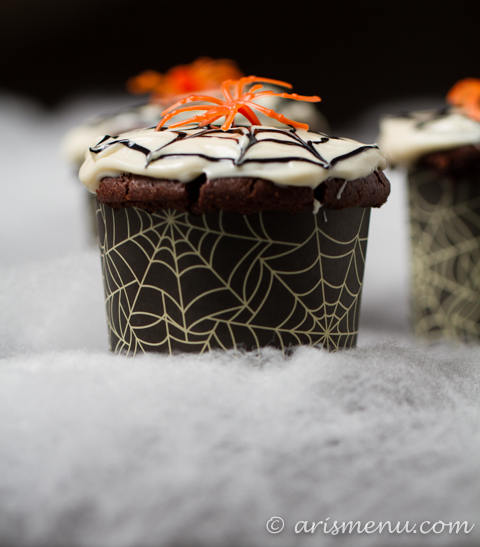
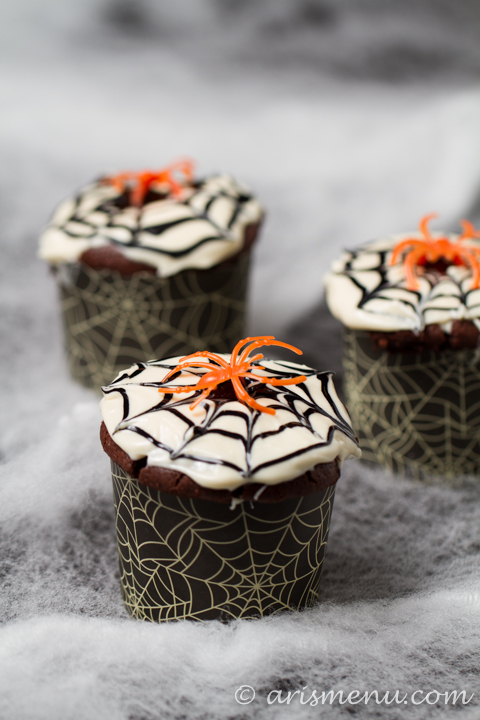
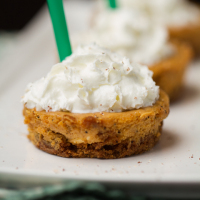
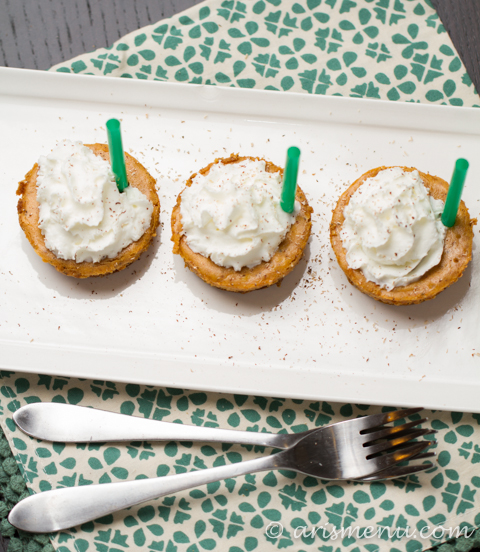
I wasn’t sure how the flavor would translate to a cupcake, but these babies exceeded all of my expectations! I’m not usually a cupcake person, but I kept finding myself eating the few I left behind at my house, and regretting (well, only partially…) all the extras I brought to work.

Cafe Au Lait Cupcakes Ultra soft espresso cupcakes with a to die for cream filling

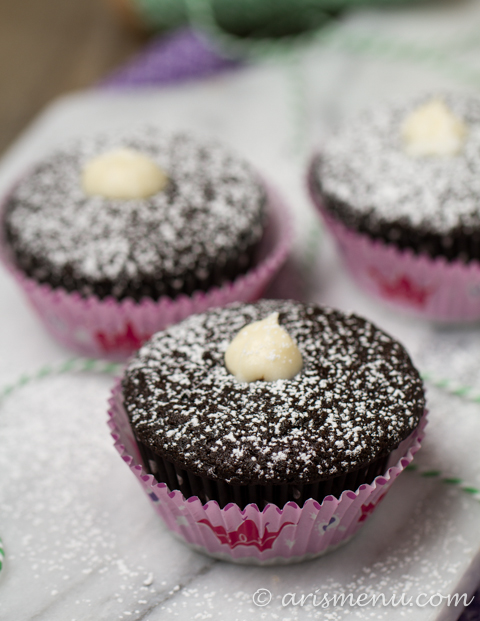
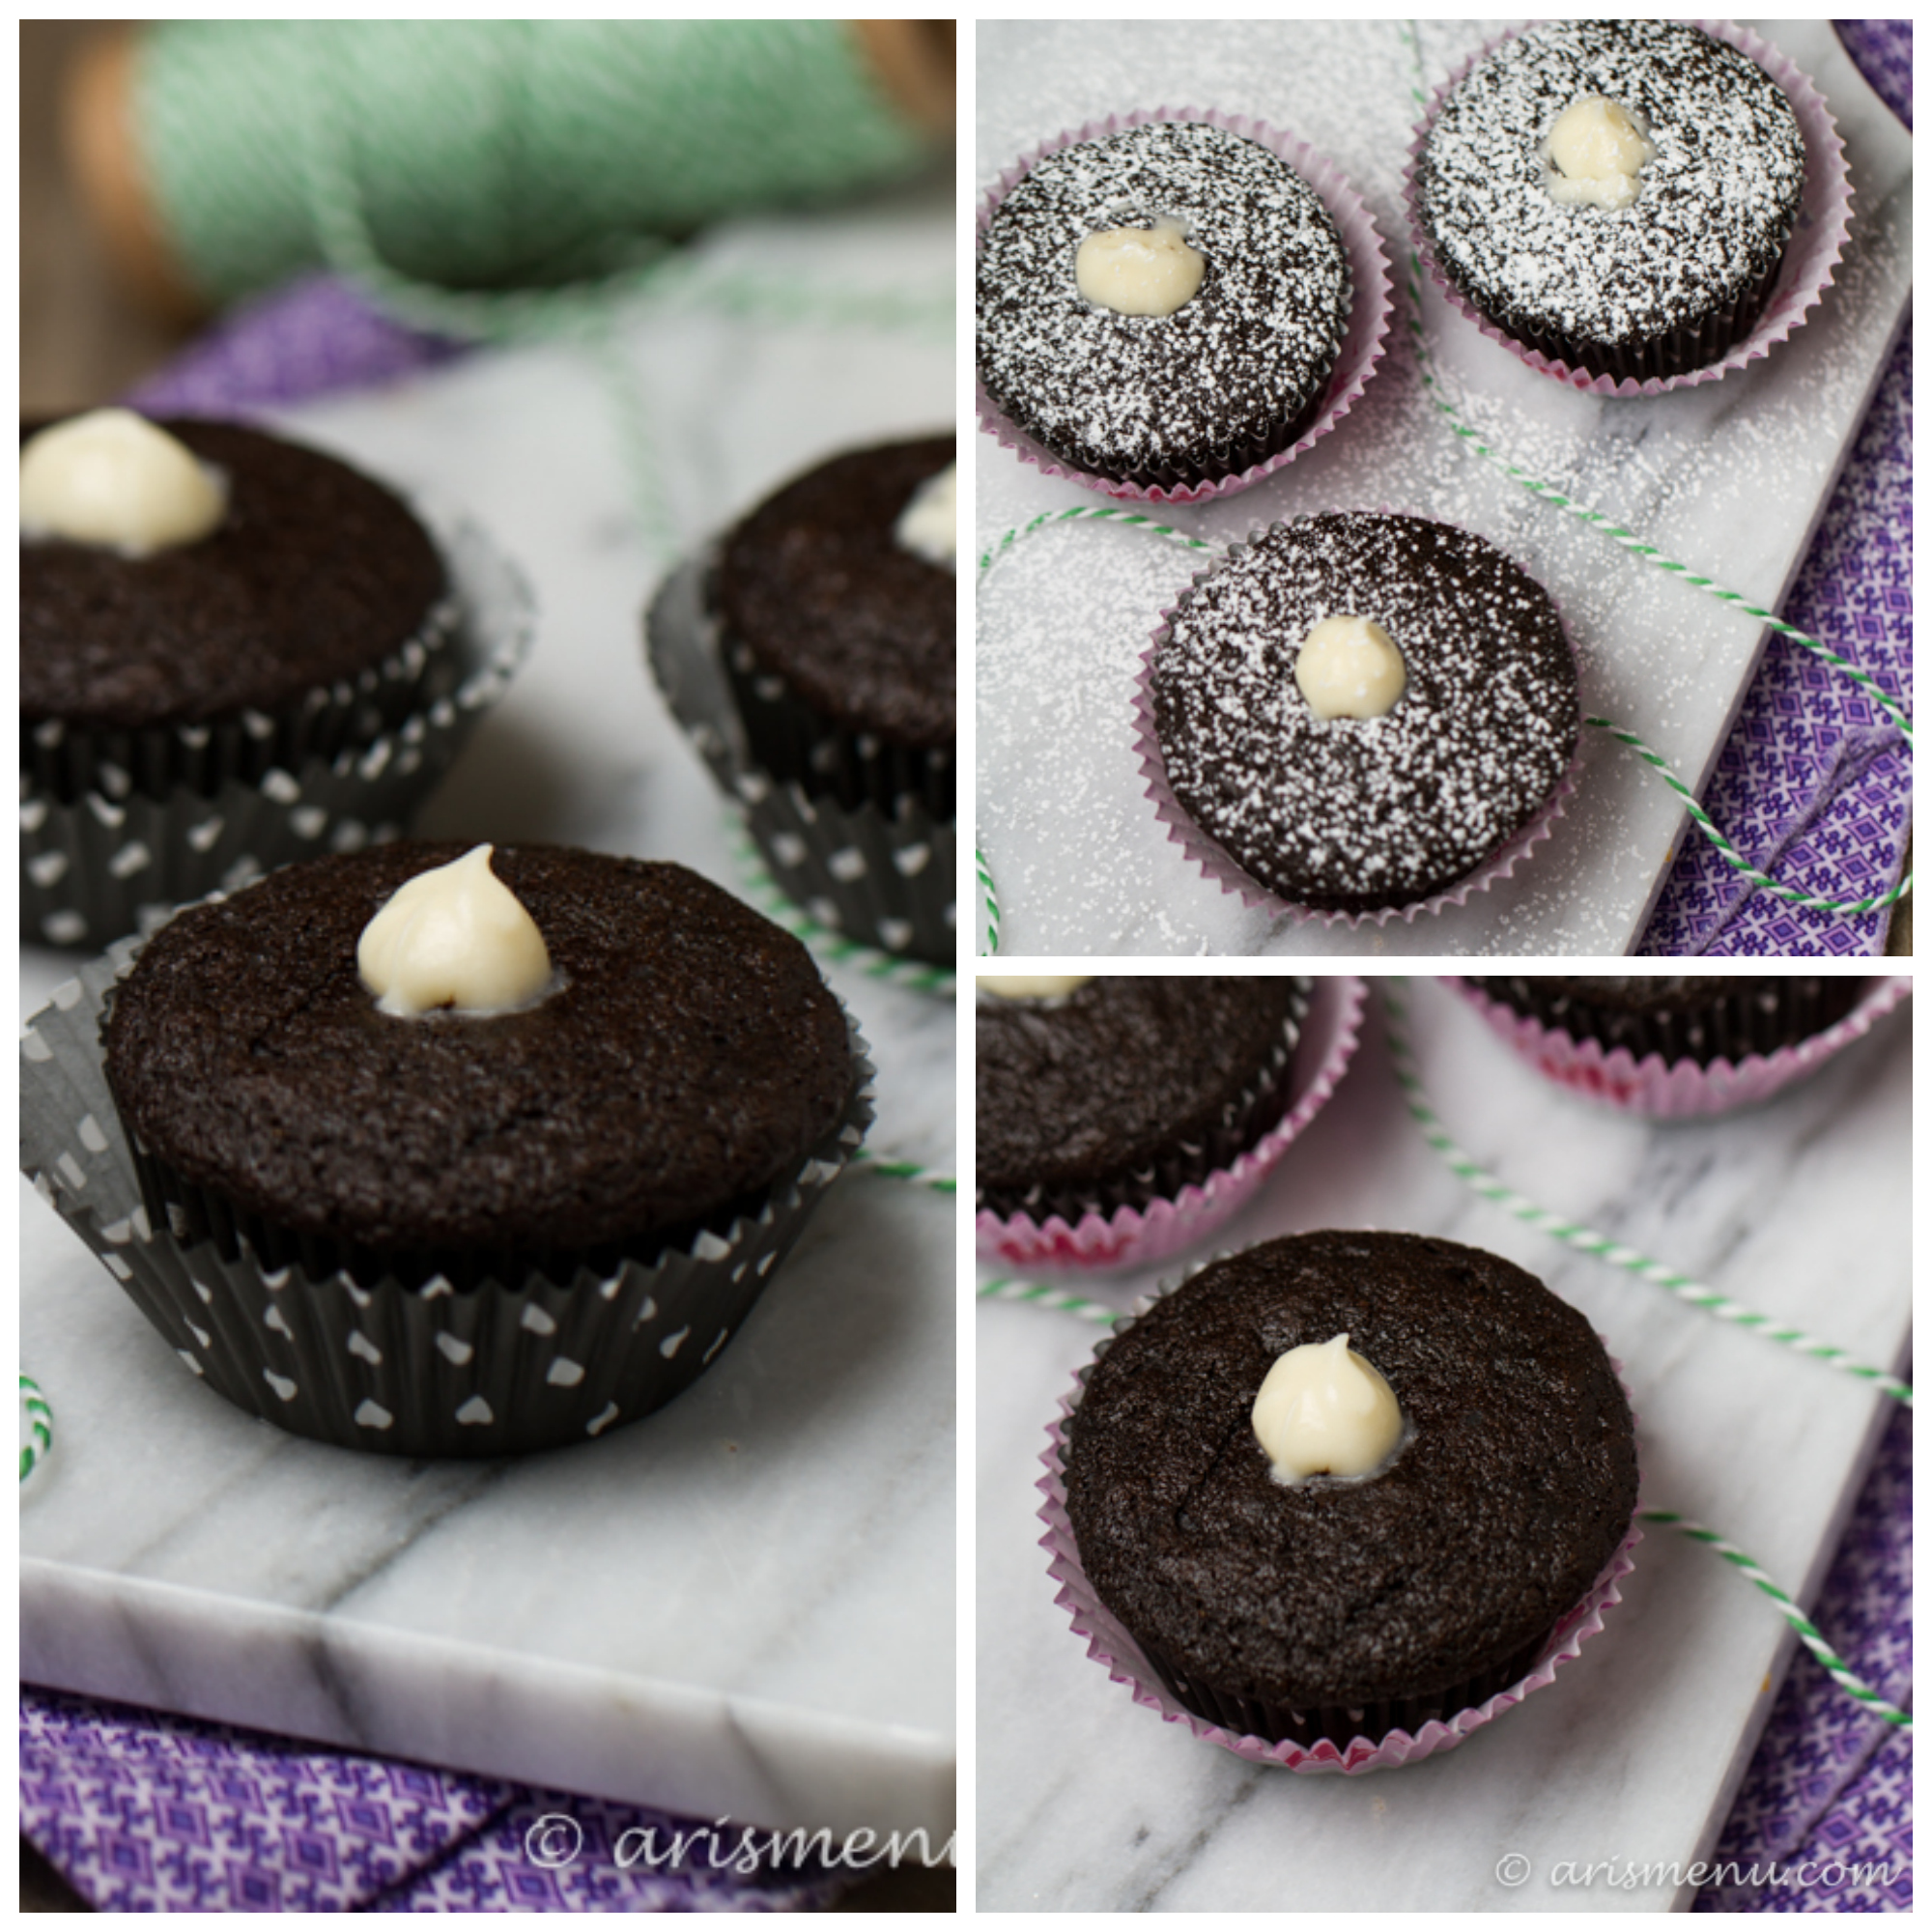
The cupcakes are so soft. The texture is so perfect that I even surprised myself, but it’s that filling that really takes them to the next level! Filled cupcakes are great because they seem so difficult, but really it’s easy to do, and I show you exactly how I fill them in the video, so make sure to check it out!

Print
Drink & Dish: Cafe Au Lait Cupcakes

Prep Time: 45 minutes

Cook Time: 20 minutes

Total Time: 1 hour, 5 minutes

Yield: 2 dozen regular cupcakes, or approx 60 minis

Serving Size: 1 cupcake, or 2 minis

Drink & Dish: Cafe Au Lait Cupcakes

Ultra soft gluten-free espresso cupcakes with a to die for cream filling. A classic cafe au lait re-invented as a fun, festive and delicious cupcake.

Ingredients

    For the cupcakes:
  • 2 2/3 cups gluten-free baking blend (or white whole wheat flour)
  • 2/3 cup unsweetened cocoa powder (not Dutch process)
  • 1 1/2 tablespoons espresso powder
  • 2 teaspoons baking soda
  • 1 teaspoon baking powder
  • dash salt
  • 3/4 cup unsweetened applesauce
  • 1/4 cup coconut oil, melted
  • 1 cup brown sugar
  • 1/3 cup sugar
  • 1 1/2 teaspoons vanilla extract
  • 2 eggs
  • 1 cup reduced fat buttermilk
  • 1 cup strong brewed coffee
  • powdered sugar for dusting, optional
  • For the filling:
  • 8 ounces heavy whipping cream
  • 8 ounces reduced fat cream cheese, softened
  • 2 cups powdered sugar
  • 1 teaspoon vanilla extract

Instructions

  1. Preheat oven to 350. Line 2 muffin tins with paper liners. Either stand or mini muffin tins will work. Set aside.
  2. In a large bowl, combine baking blend, cocoa powder, espresso powder, baking soda, baking powder and salt. In a separate large bowl or stand mixer, beat together applesauce, coconut oil, sugars and vanilla until well combined. Add eggs one at a time and mix until combined.
  3. To the applesauce mixture add approximately (eyeball it) 1/3 of your dry mixture, followed by buttermilk. Add an other 1/3 of dry ingredients, then coffee, and finish with remaining third of dry ingredients mixing until just combined. Do not over mix.
  4. Fill muffin tins 3/4 full. Bake until a toothpick inserted in the center comes out with just a few crumbs, 20-25 minutes for full size cupcakes; 10-13 minutes for minis. Cool completely.
  5. To make the filling, whip cream in a stand mixer or using a handheld mixer until soft peaks form and it turns into whipped cream. In a large bowl, beat cream cheese until smooth. Add powdered sugar one cup at a time beating until well combined. Beat in vanilla. Fold in whipped cream.
  6. Transfer filling to a pastry bag fitted with a narrow ended tip. Plunge tip into the center of each cupcake and squeeze filling into the center until the top of the cupcake starts to expand slightly. Remove, and repeat with remaining cupcakes. Dust with powdered sugar if desired. Store refrigerated in an airtight container for up to one week.
3.1
http://www.arismenu.com/drink-dish-cafe-au-lait-cupcakes/

Filed Under: Cupcakes, Dessert, Drink & Dish, Gluten-free, Holiday & Seasonal, Popular Posts · Tagged: cafe au lait, cupcake video, cupcakes, dessert, drink and dish, gluten free, gluten free mardi gras, mardi gras, mardi gras cupcakes

Drink & Dish: Caramel Stuffed Ginger Molasses Cookies

December 9, 2013 · by Ari · 23 Comments

Soft baked ginger molasses cookies stuffed with sweet, gooey caramel. These will easily become your new favorite Christmas cookie! Gluten-free with vegan option.

Caramel Stuffed Ginger Molasses Cookies

Would you believe me if I told you that until this year, I had never actually done a cookie swap? Okay, that’s a lie, I did The Great Food Blogger Cookie Swap two years ago (And again this year which means you’re getting two…actually 3…days in a row this week. I’m sure you’re devastated.), but I had never done a real life one. I was just always the one giving away all of the cookies. The idea of getting some in return of kind of amazing!

Caramel Stuffed Ginger Molasses Cookies

This year we did a cookie swap at book club, and that was my first, official, in real life cookie swap. So much deliciousness. Did I tell you I was in a book club? Ummm, I am SO BAD at it. It’s been going on for almost a year? More than a year? And I’ve read 2 books. Well, that’s not even true. I read one book, then when it was my turn I picked my favorite play (August: Osage County), and never got around to rereading it. I just show up, drink wine, and at Christmas time, swap cookies.

Caramel Stuffed Ginger Molasses Cookies

But seriously, if you’ve sucked at anything in life and want to make up for it, I feel like these cookies might be the key to solving all past mistakes. They *might* be the best cookies I’ve ever made. It’s so hard because cookies are my favorite. As if you couldn’t tell. Most of the time brownies and cupcakes, while delicious, are only mildly tempting, but cookies get me every single time. So clearly, I make them a lot, and these are definitely high on my list.

Caramel Stuffed Ginger Molasses Cookies

In fact, after I brought them in to work, I had requests for more for practically a week. Pretty much until I made them again for Drink & Dish, and had more leftover cookies to bring in to satisfy everyone’s craving. The sugared edges give them a light crispiness, but the insides are cookie-dough-soft. Almost like if it was a gingerbread brownie on the inside. I can hardly describe it–just think absolute perfect cookie texture. And with soft, melty caramel in the middle? It honestly doesn’t get much better. They are best with homemade caramels. You can see how well homemade caramels melt in these salted caramel mocha cookies. For these I just used store bought because that’s what I had, and ya know what? They still came out awesome. You could also use vegan caramels to make them vegan (captain obvious), or omit the caramels if it’s not your thing. The cookie itself is so good it stands on it’s own.

Caramel Stuffed Ginger Molasses Cookies

Sooooo, in case you couldn’t tell, the theme of this episode of Drink & Dish is Christmas Cookie Swap! Nicole and I wanted to make sure that you guys had awesome things to bring to all your holiday swaps. Nicole makes a gingerbread martini that is absolutely to die for, and obviously the perfect pairing to these cookies!

These are absolutely a must-make this holiday season, and a great way to spice up your usual ginger molasses fix!

Print
Drink & Dish: Caramel Stuffed Ginger Molasses Cookies

Prep Time: 30 minutes

Cook Time: 10 minutes

Total Time: 1 hour, 10 minutes

Yield: 2 dozen

Serving Size: 1 cookie

Drink & Dish: Caramel Stuffed Ginger Molasses Cookies

Soft baked ginger molasses cookies stuffed with sweet, gooey caramel. These will easily become your new favorite Christmas cookie! Gluten-free with vegan option.

Ingredients

  • 2 cups gluten-free baking blend (or white whole wheat flour)
  • 1 tsp baking soda
  • 1 1/2 tsp ground ginger
  • 1 tsp ground cinnamon
  • 1/2 tsp ground cloves
  • dash salt
  • 1/2 cup apple butter
  • 1/4 cup molasses
  • 3/4 cup dark brown sugar
  • 2 tsp vanilla extract
  • 24 caramels*
  • granulated sugar for rolling

Instructions

  1. In a medium bowl, whisk together baking blend, baking soda, spices and salt.
  2. In a large bowl, beat together apple butter, molasses, brown sugar and vanilla until smooth. Beat in dry ingredients until just combined. Cover and refrigerate for 30 minutes.
  3. Preheat oven to 350. Line 2 large baking sheets with silpat or parchment paper.Roll dough into approximately 1" balls. Press caramel inside, and roll dough back around. Make sure caramel is completely covered. Add more dough if necessary. Roll in sugar and transfer to prepared baking sheet. Repeat with remaining dough.
  4. Bake until just set, about 9-11 minutes. Cookies will look underdone,. Do not over bake. Cool completely on cookie sheet. Store in an airtight container at room temperature for up to one week.

Notes

*Use vegan caramels, or omit caramel to keep vegan.

3.1
http://www.arismenu.com/drink-dish-caramel-stuffed-ginger-molasses-cookies/

Filed Under: Cookies, Dessert, Drink & Dish, Gluten-free, Holiday & Seasonal, Vegan · Tagged: caramel, cookie swap, cookies, dessert, drink and dish, ginger, gluten free, molasses, recipe, vegan

Drink & Dish: Spider Web Cupcakes

October 23, 2013 · by Ari · 34 Comments

Easy & fun spider web cupcakes are the perfect treat to bring to your Halloween party, and they are totally fool-proof!

Spider Web Cupcakes

When I was a little kid, I absolutely LOVED Halloween. Not surprising that this theatre kid loved getting dressed up, right? The best part was that every year my dad would take me trick-or-treating, and we would have themed costumes. I can’t remember everything we did, but I know it included The Lion King and 101 Dalmations. Sometimes he would rent the most elaborate costumes from local costume shops. He always went all-out, and it made the holiday really special to me.

Spider Web Cupcakes

In fact, I’m pretty sure I went trick-or-treating all the way through high school, and even one year in college (with my brother–not alone!!). Oh my brother…one year we went he was riding some scooter around! The epitome of lazy, right? I have never let him get over that one!

Spider Web Cupcakes

I actually haven’t really gotten into Halloween for a long time…until this year! You guys, Nicole and I had such a blast getting dressed into costumes, playing with dry ice and spider webs, and creating fun Halloween concoctions together. It really reminded me what this holiday is about (for me)–having fun.  I’m actually looking forward to it this year also because I work at an arts school, and I just know my students are going to come decked out in super creative costumes.

Spider Web Cupcakes

So let’s chat about these cupcakes. They are ridiculously simple. You can use any chocolate cupcake you’d like. Homemade, box mix, even one you buy from the store. I like chocolate because of the dark color, but anything will work. Red? Orange? Candy corn colors? You name it. Then you just need a white frosting. I used cream cheese because that’s what I like, but you could use butter cream, or even a store bought variety (although, I beg you, don’t buy the ones with the weird hydrogenated oils). You’ll also need some black royal icing. Confession:I bought one at the store. This stuff is totally out of my realm, and I was all about ease and simplicity.

Spider Web Cupcakes

A few tips that will help you:

  • Use a very small tip on your piping bag.  <—Small tip = more control
  • Chill the royal icing. <–chilled icing makes it thicker, less runny, and easier to work with
  • Start conservatively. <–You can always add later, but you can’t take away.
  • Practice on some wax paper or paper towel before trying it out on your cupcakes. <–I did, and I figured out what I liked.

In the latest episode of Drink & Dish, I demonstrate exactly how to make these, so you can see the step-by-step process. Nicole makes a devil’s food cake martini that is not only delicious, but she also shows how to use her awesome fake blood to make your martini look like blood is dripping down it–totally creepy and awesome. Oh, and we definitely wore costumes. It was my favorite episode we’ve ever filmed.

Print
Drink & Dish: Spider Web Cupcakes

Prep Time: 10 minutes

Total Time: 10 minutes

Drink & Dish: Spider Web Cupcakes

Easy & fun spider web cupcakes are the perfect treat to bring to your Halloween party, and they are totally fool-proof!

Ingredients

  • Chocolate cupcakes
  • Cream cheese frosting (or butter cream, or any white frosting)
  • Black royal icing

Instructions

  1. See instructional video
3.1
http://www.arismenu.com/drink-dish-spider-web-cupcakes/

Filed Under: Cupcakes, Dessert, DIY/How To, Gluten-free, Holiday & Seasonal, Miscellaneous · Tagged: cupcakes, decorating, design, drink and dish, halloween, spider web cupcakes, spiders

Drink & Dish: Pumpkin Waffle French Toast

October 16, 2013 · by Ari · 15 Comments

Light and fluffy gluten-free pumpkin waffles turned into sweet, pumpkin french toast for the best of all breakfast worlds. Do you love pumpkin as much as I do? Check out my other pumpkin recipes.

Pumpkin Waffle French Toast #glutenfree

You know what I don’t really understand? When people eat brunch at 2 pm. I mean isn’t the entire point that it’s supposed to be between breakfast and lunch? You know, because you sleep past breakfast. Well, I don’t. I have an internal clock and 6:30 is considered sleeping in for me. When I say brunch, I mean 10am and that’s like…we’re eating at 10am because I’ve been up for 4 hours and could have already eaten, and then been hungry again by now. I’ve always had a big appetite.

Pumpkin Waffle French Toast #glutenfree

And I’m not one of those easy going hungry people either. Nope. Cranky, irritable, and hangry (hungry/angry) is more my style. Not to mention dramatic. I can’t even tell you how many times I have told Steve that I was “literally starving to death” or that “I have never been so hungry!”

Pumpkin Waffle French Toast #glutenfree

10am really is the right time. Wake up, drink coffee, start cooking, and by the time you’ve become a fully developed human being (it takes me a workout, or at least an hour), people start arriving, and you’ve become at least mildly pleasant.

Pumpkin Waffle French Toast #glutenfree

So let me explain this french toast to you. It’s really pretty simple. You take a waffle–any waffle, but preferably this pumpkin one–and you soak it in some French toast batter (do you call it batter? it’s not really a batter? you get the point…) for an hour or so, then you just pan fry it up like regular french toast. It truly is the best of all breakfast worlds. A couple things to note: If you use homemade waffles, you want them to be cooked crispy, and 1-2 days old, otherwise they will get soggy. If you’re using a frozen waffle, toast it first.

Pumpkin Waffle French Toast #glutenfree

For our final fall episode of Drink & Dish, Nicole and I went with a harvest brunch (in case my entirely too long rant about brunch time wasn’t an indication…). Nicole makes a delicious pumpkin chai latte that is so warm and comforting, it will knock your socks off! Also, don’t forget to subscribe to Drink & Dish on YouTube!

In addition, I have an important announcement! After hearing that many of you were worried about completing the Drink & Dish video challenge in the time allotted, we have decided to extend it all the way to New Years! We really want to see as many people as possible succeed with their videos, so you still have plenty of time to enter!

Print
Drink & Dish: Pumpkin Waffle French Toast

Prep Time: 10 minutes

Cook Time: 30 minutes

Total Time: 1 hour, 40 minutes

Yield: 8-10 servings

Serving Size: 1 waffle

Drink & Dish: Pumpkin Waffle French Toast

Light and fluffy gluten-free pumpkin waffles turned into sweet, pumpkin french toast for the best of all breakfast worlds.

Ingredients

    For the pumpkin waffles:
  • 2 cups gluten-free baking blend
  • 1 tbsp baking powder
  • 1 tbsp ground cinnamon
  • 1 tsp pumpkin pie spice
  • Dash salt
  • 1/4 cup pure maple syrup
  • 1 3/4 cup reduced fat buttermilk
  • 3 eggs, lightly beaten
  • 1 cup canned pumpkin
  • 2 tsp vanilla extract
  • For the french toast:
  • 1 cup pumpkin puree
  • 2 eggs + 8 egg whites
  • 2 cups unsweetened almond milk
  • 1 1/2 tbsp vanilla
  • 1/4 cup pure maple syrup
  • 1 1/2 tbsp pumpkin pie spice

Instructions

  1. To make the waffles, in a large bowl whisk together baking blend, baking powder, cinnamon, pumpkin pie spice and salt.
  2. In a medium bowl, whisk together wet ingredients. Gently fold wet ingredients into dry until just combined. A few small lumps are fine--you do not want to overmix. Let stand for 10 minutes.
  3. Meanwhile, preheat waffle heater. Spray with nonstick spray. Once batter has rested, cook until lightly browned and edges are crisp, about 10 minutes.
  4. To make the french toast, in a large bowl beat together pumpkin, eggs, almond milk, vanilla, maple syrup, and pumpkin pie spice. Place waffles in a large shallow dish and cover with pumpkin/egg mixture. Cover and refrigerate for 1 hour.
  5. Spray a large skillet with nonstick spray. Cook each waffle until browned and edges crisp, about 5-7 minutes per side. Serve immediately with maple syrup and fresh berries if desired. Leftovers can be stored in the refrigerator in an airtight container for up to 5 days.

Notes

Best with crisp-cooked day old waffles. You may use frozen waffles or any waffle you'd like. This is a huge recipe that can easily be halved or quartered.

3.1
http://www.arismenu.com/drink-dish-pumpkin-waffle-french-toast/

Filed Under: Breakfast, Drink & Dish, Fall, Gluten-free, Holiday & Seasonal · Tagged: breakfast, drink and dish, fall, french toast, gluten free, pumpkin, recipe, waffles

Drink & Dish: Brussels Sprouts with Apple, Bacon & Dates

October 8, 2013 · by Ari · 21 Comments

Tender seared brussels sprouts with crispy bacon, soft and sweet dates, and crunchy chopped apples topped with a sweet balsamic glaze. Looking for more healthy side dishes? Check these out!

Brussels Sprouts with Bacon, Dates & Apples

I want to tell you a story. A love story…of sorts. You see, I used to hate brussels sprouts. People all over the internet go crazy for them, and I never got it. I legit thought they were gross.

Brussels Sprouts with Bacon, Dates & Apples

Then I tasted them in a big dish of roasted veggies, and decided I could tolerate them. They weren’t terrible, but I would still find a couple lingering on my plate after I had devoured every other vegetable on there. I’m a girl who loves my veggies–I eat them first, and I almost always finish them. I would be a great example for your children.

Brussels Sprouts with Bacon, Dates & Apples

One day, I ordered a dish at True Foods that included brussels sprouts. I took a bite and immediately went back in for more thinking it must be a fluke. They were incredible! I find myself digging around on my plate searching, trying to find every last one. I usually only do that with goat cheese! 😉

Brussels Sprouts with Bacon, Dates & Apples

Ever since that day, there has been a new veggie love in my life and I have never looked back. These quickly became my new favorite snack, and I began the process of convincing Steve that brussels sprouts really weren’t gross (he was not convinced). I figured out what made them work for me–they had to be well cooked. Soft, but not mushy. Definitely not hard and crunchy. They also had to have a beautiful browned sear for the most possible flavor. And they are always  better with bacon.

Brussels Sprouts with Bacon, Dates & Apples

In New Orleans I had them with bacon and dates–they came with this sweet sauce, and they were literally to die for. I gave Steve a bite and he changed his mind right then and there. He told me he would only ever eat them if they tasted like that. Challenge accepted. And I added some apples because, well, it’s fall and they just make it even better.

Brussels Sprouts with Bacon, Dates & Apples

Funny story, when I made these the first time (for testing, photographing and…dinner), I chopped up the apples to throw in at the last second. You must throw them in at the last second. I despise mushy apples. Anyway, I also sliced some up for the photo. I plated everything, took the pictures, and then after I was finished Steve asks me “Are you doing anything with all these chopped apples in the kitchen?” *face-palm* I had them all chopped and ready to go and never actually put them in. So I added them right then–at the very, very last second. I do things like that all the time–get something ready for a photo then completely forget about it. Please tell me it’s not just me.

Brussels Sprouts with Bacon, Dates & Apples

For this second fall episode of Drink & Dish, I wanted to share something savory with you. I always forget about fall veggies and get caught up on pumpkin desserts. Brussels sprouts (and apples!) are fall all-stars as well, and I figured it was time for them to take the front seat! This dish pairs perfectly with Nicole’s delicious apple cider cocktail! Make sure you check it out, and of course subscribe to D&D on YouTube!

Print
Drink & Dish: Brussels Sprouts with Apple, Bacon & Dates

Prep Time: 10 minutes

Cook Time: 30 minutes

Total Time: 40 minutes

Yield: approx 4 servings

Drink & Dish: Brussels Sprouts with Apple, Bacon & Dates

A delicious, healthy, sweet and savory side dish perfect for fall.

Ingredients

  • 1 cup brussels sprouts, halved and stems removed
  • 1 tbsp olive oil
  • salt and pepper
  • 2 slices center cut bacon, chopped
  • 4 dates, pitted and chopped
  • 1/2 apple (honeycrisp, gala, whatever you like)
  • For the balsamic glaze (optional):
  • 1/2-1 cup good quality balsamic vinegar

Instructions

  1. Begin with the balsamic glaze by pouring balsamic vinegar into a small sauce pan over high heat. Bring to a boil and reduce to medium-medium high to simmer. Stir occasionally until sauce has reached desired thickness. This took me about 30 minutes for a very syrupy glaze. 20-30 minutes should be all you need. Once desired consistency is reached, remove from heat immediately.
  2. Fill a medium sauce pan half way with water. Bring to a boil. Add brussels sprouts and cook for just 2-3 minutes. Strain and remove. This step helps soften the brussels sprouts--if you like them crunchier, feel free to skip it.
  3. Heat olive oil in a large pan over medium heat. Set aside any extra leaves that fall off your brussels sprouts--you'll use those later (they cook faster). Add brussels sprouts flat side down. Season with a generous pinch each of salt and pepper. Cook until seared and brown, about 5-7 minutes. Flip brussels sprouts and move them all to one side of your pan.
  4. Add bacon to the other side of the pan and cook until it begins to crisp, about 5 minutes. Add dates and extra brussels sprouts leaves. Toss to combine. Continue cooking for an additional 5 minutes.
  5. At the very last moment, add chopped apple and give a quick toss. Remove from heat. Serve topped with balsamic vinegar if desired. This dish is best served immediately, but leftovers can be stored in the refrigerator in an airtight container for up to 5 days.
3.1
http://www.arismenu.com/drink-dish-brussels-sprouts-apple-bacon-dates/

Filed Under: Appetizers, Drink & Dish, Fall, Gluten-free, Holiday & Seasonal, Paleo, savory, Side Dish · Tagged: apples, bacon, balsamic glaze, brussels sprouts, dairy free, dates, drink and dish, fall, fruit, gluten free, recipe, side, side dish, vegetables

Drink & Dish Video Challenge

October 1, 2013 · by Ari · 7 Comments

Hi friends! Guess what??? As many of you know, in lieu of our recent speaking engagements on video content, Nicole and I have decided to create a video challenge. This means you have the opportunity to get started on video, and the chance to win faaaabulous prizes (from a girl who loves to win)!

#DrinkAndDish Video Challenge!

We know how tough it can be to add a video component to your blog, so if you’ve been considering it for a while, think of this as a nice kick in the pants. If you always said you would never dream of doing video, think of it as an opportunity to win free stuff! If you’re looking for some tips and tricks to get started, check out the slides from out latest video presentations. Nicole is a powerpoint artist.

To enter:

1. Sign up for a YouTube or Vimeo account and subscribe to the Drink & Dish YouTube Channel.
2. Brainstorm a list of at least 5 potential video topics.
3. Pick one idea and grab a camera (any camera that can record video!)
4. Create a video (3 min or less).
5. Edit your video – in some way. This could be cutting out a mistake or even just adding music.
6. Post the video to YouTube and share it on your blog. In the post link back to this post about the challenge.
7. Send an email to DrinkandDish(at)gmail(dot)com with a link to your blog post featuring the video.
8. Complete all this by December 31st!

To WIN!:

Nicole and I will review all the submissions and evaluate them based on these factors:

  • Personality – Let the real you shine through!
  • Content – Does you video fit with your blog & enhance it in some way? Does your video have a purpose?
  • Quality – Can we see what you’re doing clearly & hear what you’re saying?

Prizes:

We will choose the top 5 videos after the submission deadline on October 15th, and winners will receive:

  • Grand Prize – An 8MB HD Digital Video Camera
  • 1st through 5th place will each receive a clip-on lapel microphone

This contest is sponsored by, well, us! We want you to take the plunge and begin your video journey! Please feel free to spread the word–tell your friends about the challenge, and maybe even ask them to join you on camera! Can’t wait to see what you all put together!!

Filed Under: Uncategorized · Tagged: drink and dish, giveaway, video

Drink & Dish: Pumpkin Spice Latte Cheesecake Cups {gluten-free}

September 22, 2013 · by Ari · 18 Comments

Pumpkin Spice Latte Cheesecake Cups #glutenfree

I would like to propose that the United States of America switch to 3 days weekends. Or, at least that my schedule could switch to 3 day weekends. I feel like one day I spend riding my bike all day (not at all an exaggeration! 2-5 hours is seriously allllll day), and the next day is filled with meal prep, grocery shopping, laundry (ew), and various other errands. Cleaning should probably be in there somewhere, but we all know I don’t actually do that.

Pumpkin Spice Latte Cheesecake Cups #glutenfree

Today my husband ran his first 5k!! It didn’t go quite like he would have hoped, but I’m still beyond proud of him for getting out there and making it happen! I also convinced a few work friends to tag along, and two of them did their very first race as well! It was fun to get out there, but it turns out not doing any speed training for almost 9 months is not the way to run at your PR pace. Who knew? Anyway, that was my weekend. 56 mile bike ride Friday (okay so that wasn’t even the weekend yet…), 36 mile bike ride Saturday (my first group ride, I didn’t get dropped, and Strava told me I rode one of the miles @ 23mph!!!), and then a 5k on Sunday. I need a weekend from my weekend.

Pumpkin Spice Latte Cheesecake Cups #glutenfree

The good news is the first day of fall is finally here, and I’m *finally* feeling a hint of it in the air. I couldn’t be happier. It’s no longer hot at 5am. In fact, there is a nice breeze, and the temperature feels perfect. I don’t see any triple digits on the horizon, and pumpkin spice syrup is sneaking its way back into my iced coffee every now and then. And also, my cheesecake.

Pumpkin Spice Latte Cheesecake Cups #glutenfree

I know everyone says it, but I really do love this time of year. There is something so cozy about the fall, and knowing that the holidays are coming (<3 all things holiday spirit!). It just makes my heart happy. Not to mention the flavors. I’ve always been obsessed with the pumpkin spice latte. The last couple of years, I’ve made pumpkin spice latte cupcakes, but I wanted to share something a little different with you guys that still showcases the amazing flavor combination. Every year, I make pumpkin cheesecake for Thanksgiving, and decided to do a little twist on that. The result? Like cheesecake and a pumpkin spice latte had a love child, and it only got the best genes from each parent. They are ridiculously good, and even include a gingersnap crust with a hint of coffee flavor to bring everything together.

Pumpkin Spice Latte Cheesecake Cups #glutenfree

To pair with my cheesecake cups, Nicole made a spiced pear martini that is bursting with fall flavors. I’m not normally someone who jumps at pear flavored things, but the spices round it out perfectly to create a not-too-sweet, cozy pear drink that is a must try! And of course make sure you check out the latest episode of D&D and please subscribe on YouTube!

Print
Pumpkin Spice Latte Cheesecake Cups {gluten-free}

Prep Time: 10 minutes

Cook Time: 30 minutes

Total Time: 5 hours

Yield: 12 cups

Serving Size: 1 cup

Pumpkin Spice Latte Cheesecake Cups {gluten-free}

All the flavors of the fall favorite pumpkin spice latte in individual cheesecake cups with a gluten-free gingersnap crust.

Ingredients

    For the gingersnap crust:
  • 1 cup crushed gingersnap crumbs (I used gluten-free)
  • 1/2 tsp espresso powder
  • 1 1/2-2 tbsp coconut oil, melted (start with 1 1/2, and add a little extra if it needs it--it depends on the brand of gingersnap and how much oil is already in the cookie)
  • For the cheesecake:
  • 1 lb reduced fat cream cheese, at room temperature
  • 1/2 cup pumpkin puree
  • 2/3 cup brown sugar
  • 2 eggs
  • 1/2 tsp pumpkin pie spice
  • 1/2 tsp espresso powder
  • 1 tsp vanilla extract
  • For garnish:
  • Whipped cream
  • Freshly ground nutmeg

Instructions

  1. Preheat oven to 350. Spray a standard muffin tin with nonstick spray. Set. Aside.
  2. To make the crust, combine gingersnap crumbs, 1/2 tsp espresso powder and coconut oil in a medium bowl. Place approx 1 tablespoon of crust into each muffin tin. Press down with your fingers, the back of your spoon, or a shot glass. Bake until set, about 7-10 minutes. Cool on a wire rack while you prepare the filling.
  3. To make the cheesecake, beat cream cheese, pumpkin puree and brown sugar together in a large bowl or stand mixer. Add eggs one at a time, mixing until combined. Beat in vanilla, pumpkin pie spice and 1/2 tsp espresso powder.
  4. Evenly divide the cheesecake batter between your 12 muffin tins.
  5. Bake until lightly browned and just set, about 15 minutes. Turn the oven off and crack the door. Allow cheesecakes to sit in opened oven for an additional 15 minutes.
  6. Cool completely on a wire rack, then refrigerate until fully chilled, about 3-4 hours. Garnish with whipped cream and freshly ground nutmeg (if desired) to serve. Store covered in refrigerator for up to one week.
3.1
http://www.arismenu.com/drink-dish-pumpkin-spice-latte-cheesecake-cups-gluten-free/

Filed Under: Cheesecake, Cupcakes, Dessert, Drink & Dish, Gluten-free, Holiday & Seasonal · Tagged: cheesecake, coffee, dessert, drink and dish, fall, gingersnap crust, gluten free, pumpkin, pumpkin spice latte, pumpkin spice latte cheesecake, recipe

Drink & Dish: Jalapeno Popper Hot Dogs

August 29, 2013 · by Ari · 16 Comments

Jalapeno Popper Hot Dogs

So…apparently it’s football season? Or it’s about to be? To be honest, I have absolutely no idea. Sometimes people post things about it on facebook, and as soon as I even read the word football, I immediately think “Ewww” and scroll away.

Jalapeno Popper Hot Dogs

I went to school at the University of Idaho (yes….Idaho), and football was a BIG deal. We had some big rivalry with Boise State, but our football team was terrible, and I’m pretty sure we never won a single game.

Jalapeno Popper Hot Dogs

I’m sure it comes as no surprise that I’ve never been a sports person. Like, at all. I was always the un-athletic artsy kid, and even now that I have a tumultuous love affair with endurance sports, I have to admit that I still don’t really enjoy watching  any of them. I’ve always said the only reason I wanted to go to any sporting event was for the hot dogs. I’ve never had any problem getting excited about food.

Jalapeno Popper Hot Dogs

I knew I wanted to create a delicious hot dog for our tailgating episode of Drink & Dish, but I wasn’t quite sure where I wanted to take it, until I had a little brainstorming sesh with one of my favorite foodies, and before I knew it, I was sold on these jalapeno popper dog. I mean, let’s get real here–it’s a hot dog wrapped in bacon topped with jalapeno cream cheese, then topped with more cheese and fresh jalapenos. It is every bit as delicious as it sounds–the flavors, the textures!–and shockingly light in the calorie department. I mean, it’s no green smoothie, but pair it with some veggies, and it is a delicious meal for any occasion.

The cream cheese mixture is easy to make ahead and take with you to your tailgating event, and the hot dogs come together in minutes! They pair perfectly with Nicole’s game day beer punch. Nicole and I both agreed that this episode of D&D has to be one of our favorites. Check it out!

Print
Drink & Dish: Jalapeno Popper Hot Dogs

Prep Time: 5 minutes

Cook Time: 5 minutes

Total Time: 10 minutes

Yield: 2 hot dogs*

Serving Size: 1 hot dog

Drink & Dish: Jalapeno Popper Hot Dogs

Ingredients

  • 1/4 cup reduced fat cream cheese
  • 2 tbsp plain Greek yogurt, nonfat or low-fat
  • 1/2 jalapeno, ribs and seeds removed (+ extra for topping)
  • 1 clove garlic
  • 2 low fat all beef hot dogs (or turkey dogs)
  • 2 slices center cut bacon
  • 2 hot dog buns, preferably whole grain (whole wheat, any whole grain gluten-free option, etc.),
  • Approx 2 tbsp freshly shredded reduced fat cheddar cheese

Instructions

  1. Place cream cheese, Greek yogurt, 1/2 jalapeno and garlic in food processor. Pulse until well combined.
  2. Wrap a bacon slice around each hot dog and grill over medium heat until hot dog is warmed and bacon is fully cooked, about 4-6 minutes.
  3. To serve, place cooked hot dog inside a hot dog bun (I always toast mine a little on the grill first). Top with cream cheese mixture, a pinch of cheddar cheese and a few jalapeno slices if desired. Serve immediately.

Notes

*Depending on how much cream cheese mixture you like, you may have enough to top a 3rd hot dog if desired.

3.1
http://www.arismenu.com/drink-dish-jalapeno-popper-hot-dogs/

Filed Under: Dinner, Drink & Dish, Entree, Gluten-free, Holiday & Seasonal, Lunch, Sandwiches, savory, Summer · Tagged: cheese, drink and dish, easy, gluten free, hot dogs, jalapeno popper, recipe, tailgating

Drink & Dish: Restaurant-style Watermelon Margaritas

August 19, 2013 · by Ari · 15 Comments


Restaurant Style Watermelon Margarita

I always try to spell watermelon with two Ls. Doesn’t the word mellon have two Ls? Shouldn’t watermel(l)on?? Maybe I just want to find an excuse for my terrible spelling. It’s true. You don’t even need to know how to spell these days. A red squiggly line will do it all for you, and my brain has gotten lazy. I can literally feel myself becoming less intelligent.

Restaurant-style Watermelon Margaritas

I’ve actually learned a lot about how many words I used to spell incorrectly since I started this blog. I always thought avocado was spelled avacado. That’s how it sounds in my head. I also get really confused because every time I type the word fudgy I still get a red squiggly line. So then I try fudgey which is also wrong and looks worse, so I’ll take it my computer has never eaten a delicious brownie, because if it had, it would totally know fudgy is a word.

Restaurant-style Watermelon Margaritas

Good lord, I need a margarita. Specifically the best, thickest, most flavorful margarita I have ever tasted. And trust me, I would never joke, or exaggerate about my margaritas. They are serious business, and these are the best of the best. The secret? Soaking the watermelon in the alcohol and freezing overnight. I had to get out that little push down stick for my vitamix to get everything to blend together. Restaurant-style Watermelon Margaritas

It’s easy for a frozen margarita to taste watered down and flavorless. In fact, I usually don’t order them frozen for this very reason. This margarita contains NO ICE. Simply watermelon, tequila, orange liquor, lime and agave. No overly sweet sour mix, no extra water–just real, bold ingredients. The watermelon flavor is out-of-this-world-good. It tastes fresh, natural, and like biting in to a cold, juicy watermelon. I simply cannot get these babies out of my head!

Restaurant-style Watermelon Margaritas

For our Labor Day episode of Drink & Dish, Nicole and I pulled a Freaky Friday and switched places–I made the drink, and she made the dish: a loaded potato chip dip that is to die for! Crunchy potato chips in a cheesy, creamy dip with all sorts of flavors and textures working together–it is a must try! Check out this latest episode for all the details!

Print
Drink & Dish: Restaurant-style Watermelon Margarita

Prep Time: 12 hours, 5 minutes

Total Time: 12 hours, 5 minutes

Yield: 2 extra-large or 3 medium margaritas

Drink & Dish: Restaurant-style Watermelon Margarita

Ingredients

    For freezing:
  • 1/2 medium watermelon, chopped into 1" cubes
  • 1/2 cup tequila
  • 1/4 cup orange liqueur (triple sec, grand marnier, etc.)
  • For blending:
  • 2 shots tequila
  • 1 shot orange liqueur
  • juice of 1 lime
  • 1 tsp agave
  • For serving:
  • coarse salt
  • extra lime wedges

Instructions

  1. Place chopped watermelon in a large, freezer-safe container. Poor tequila and orange liqueur evenly over chopped watermelon. Cover and freeze for 12 hours or overnight.
  2. Transfer frozen watermelon and any liquid remains from your alcohol to a high-quality blender. Add remaining ingredients and blend until smooth. If mixture is still too thick, slowly add a little more alcohol until you've reached your desired consistency.
  3. Run a lime wedge around the rim of each glass. Place salt on a small, flat plat and press the top of each glass into the salt. Fill each glass with frozen margaritas and serve immediately.

Notes

You may freeze your watermelon up to 3 days if you wish to prepare ahead of time.

If all of the frozen watermelon does not fit into your blender, start with 1 shot of tequila and 1/2 short of orange liqueur and slowly add from there. All blenders and watermelons are different, so start slowly with the alcohol and add as you go.

3.1
http://www.arismenu.com/drink-dish-restaurant-style-watermelon-margaritas-2/

Filed Under: Drink & Dish, Drinks, Gluten-free, Holiday & Seasonal, Vegan · Tagged: drink, drink and dish, margarita, recipe, summer, tequila, watermelon

Drink & Dish: Mediterranean Quinoa Salad

August 1, 2013 · by Ari · 16 Comments

Mediterranean Quinoa Salad

There are few things I love more than a fresh summer salad. It’s hot outside. I don’t want to spend hours cooking inside and then put hot food into my hot body. Haha, hot body. Who says things like that??? I mean temperature wise…obviously…

Mediterranean Quinoa Salad

I love bringing healthy sides to barbecues and get togethers. There are so many “salads” filled with gross mayo that don’t even taste very good that seem to be the tradition, and I just don’t get that. I wanted to create a salad that can wear many faces. Healthy side dish? Check. Vegetarian meal option? Check. Vegan meal option? Just leave out the cheese (which makes me cry, but if you’re vegan, you’re probably used to that by now). Serving of veggies? Yeah, got that too. My salad is a chameleon.

Mediterranean Quinoa Salad

This is also one of the simplest, easiest, and fastest dishes I’ve ever made. Seriously, as I wrote up the instructions, I thought to myself “That’s it? What did I forget?” because honestly, I feel like I always forget something. But for real, that’s it. If you cook the quinoa ahead of time and already have roasted red peppers on hand, it literally takes 5 minutes.

Mediterranean Quinoa Salad

Nicole and I always brainstorm together on what we will create for our Drink & Dish episodes that will complement each others’ recipes, but this time it truly was a match made in heaven. Her cucumber gin fizz is the perfect pairing to this salad. I’m not usually a gin person, but it was so light and refreshing, you’ve got to check it out! Also, check out our latest D&D episode!

..

Print
Drink & Dish: Mediterranean Quinoa Salad

Prep Time: 5 minutes

Cook Time: 20 minutes

Total Time: 25 minutes

Yield: 12-16 servings

Serving Size: approx 1/2 cup

Drink & Dish: Mediterranean Quinoa Salad

Ingredients

  • 1/2 cup dry quinoa
  • 1 large persian cucumber, chopped
  • 1 small 2-2.5 oz can sliced black olives
  • 1/2 cup crumbled feta cheese
  • 2 large red bell peppers, roasted and chopped (or 1 cup chopped roasted red peppers from a jar)
  • 1 cup cherry tomatoes, halved
  • 1 tbsp olive oil
  • 2 tbsp balsamic vinegar
  • generous pinch each salt and pepper

Instructions

  1. Cook quinoa according to package instructions. Drain and cool.
  2. Place cooked and cooled quinoa along with all remaining ingredients in a large bowl. Toss to combine. Serve immediately or store refrigerated in an airtight container for 5-7 days.
3.1
http://www.arismenu.com/mediterranean-quinoa-salad/

Filed Under: Appetizers, Dinner, Drink & Dish, Entree, Gluten-free, Holiday & Seasonal, savory, Side Dish, Summer, Vegan, Vegetarian · Tagged: drink and dish, gluten free, mediterranean, quinoa, recipe, salad, vegetarian

Drink & Dish: Orange Creamsicle Cookies

July 14, 2013 · by Ari · 30 Comments

Orange Creamsicle Cookies

When I was a little girl, my brother’s mom (yeah, my family is hard to explain…she’s not my mom, or my step mom…) always kept the creamsicle ice cream in the house. You know, the swirl between the orange sorbet, and vanilla ice cream? The one that is 100x superior to just the bar with the ice cream on the inside? She always had it, and I always finished it. She probably never got more than a bowl full, and I didn’t even live there.

Orange Creamsicle Cookies

There is something so refreshing about the bright, citrusy, orange flavor against the smooth and creamy vanilla that is just about perfect in every way. Great on their own, better together.

Orange Creamsicle Cookies

I’m a little obsessed with stuffing cookies. I mean, I love a good chocolate chip cookie, but it is almost always better if all of the chocolate (or white chocolate as the case may be) is contained to the center, so that when you bite into the cookies you have the same experience as, say, a jelly-filled donut. And if you don’ know it’s in there, you get an AWESOME SURPRISE!!

creamsiclecookies-13

These creamsicle cookies are dangerously addictive. The cookie is soft and chewy, and the white chocolate filling stays perfectly creamy, even after the cookies have cooled. In fact, these are a rare cookie case when they taste BETTER after cooling completely. They come out slightly underdone, and need about a full hour after that to set, and cool completely. I mean, I was impatient, and I still loved them right out of the oven, but it wasn’t until I had one the next day that I fell deeply, deeply in love. In fact, the second batch didn’t even make it past the filming day. They were that good.

Orange Creamsicle Cookies

Cookie stuffing can be one of those things that no matter how well you try to describe it, it’s better just to see it in action, so Nicole and I are bringing you an awesome summer episode of drink and dish! Be sure to check out her recipe for her delicious rum punch!

Print
Orange Creamsicle Cookies

Prep Time: 40 minutes

Cook Time: 10 minutes

Total Time: 50 minutes

Yield: 12-16 cookies

Serving Size: 2 cookies

Orange Creamsicle Cookies

Ingredients

  • 1 1/4 cups white whole wheat flour
  • 1/2 tsp baking powder
  • dash salt
  • 1/2 cup sugar
  • Zest of one orange
  • 1/2 cup reduced fat cream cheese, softened
  • 1 tbsp fresh orange juice
  • 1 large egg white
  • 4 oz good quality white chocolate squares or chopped into large chunks

Instructions

  1. In a medium bowl, whisk together flour, baking powder and salt. Set aside.
  2. In a large bowl mix together sugar and orange zest. Then beat in cream cheese, egg white, and orange juice until combined. Slowly, beat in dry ingredients until combined, scraping down sides of the bowl as necessary. Refrigerate dough for 30-60 minutes.
  3. Preheat oven to 350. Roll cookies into 1? balls, then stuff with a white chocolate square. Re-roll into 1? ball, making sure all the white chocolate is covered. Repeat with remaining dough.
  4. Bake for 9-11 minutes until golden. Cool completely on baking sheet. Store in a loosely covered container for 5-7 days.
3.1
http://www.arismenu.com/drink-dish-orange-creamsicle-cookies/

Filed Under: Cookies, Dessert, Drink & Dish, Holiday & Seasonal · Tagged: baking, cookies, creamsicle, drink and dish, orange, recipe, summer, video, white chocolate

Drink & Dish: Red, White & Blue Grilled Cheese

June 23, 2013 · by Ari · 23 Comments

Red, White & Blue Grilled Cheese.jpg

It’s almost the 4th of July!!!

Red, White & Blue Grilled Cheese

One of my very favorite holidays because I am obsessed with fireworks. I’m sure this is totally surprising information given that I am never a sucker for bright, sparkly things, but I can ooohh and ahhh for the entire fireworks show, and always get a little sad when they start going all crazy for the grand finale because that means it’s over.

Red, White & Blue Grilled Cheese

Maybe it’s because for years I never got to watch the fireworks? I’ve spent almost every summer since I was 15 years old at theatre camp. First as a student, then as a counselor, and the last few years as a teacher/director/choreographer. For most of those years, the camp was located at the top of this hill in the middle of nowhere White Salmon, WA. We were always in rehearsals at night, so I never got to get into town (a good 40 minute drive) to watch the fireworks. Now camp is in Portland, and we light little sparklers and the kids get really into it which is fun in an entirely different way.

Red, White & Blue Grilled Cheese

You know what else I love about the 4th of July? RED WHITE AND BLUE FOOD!!! Last year, I made red, white and blue cookies, and they still stand as some of my all time favorite cookies. This year, I decided to go with something you could eat for lunch or dinner while celebrating America (you have to pronounce it Ah-murrr-kah).

Red, White & Blue Grilled Cheese

This sandwich….I just…I’m not sure I even have the words? I made it 3 times in 1 week. The brie cheese is so melty and dreamy, and then the goat cheese provides the perfect creaminess. Both of these cheeses pair perfectly with fruit, and the raspberry jam adds a bright sweetness the compliments the slightly tart bursting blueberries. It sounds crazy, but it just works. It works so well that you want to eat it every day for the rest of your life. You know I’m not usually a meal repeater, but I can’t get enough of this sandwich, and I can see it making a comeback all year long.

Check out the latest episode of Drink & Dish to learn the secret to making a perfectly melty grilled cheese, and make sure to also check out Nicole’s super fun 4th of July Citrus Splash. I mean, it has poprocks and it’s BLUE!

Print
Drink & Dish: Red, White & Blue Grilled Cheese

Prep Time: 5 minutes

Cook Time: 15 minutes

Total Time: 20 minutes

Yield: 2 sandwiches

Serving Size: 1 sandwich

Drink & Dish: Red, White & Blue Grilled Cheese

Ingredients

  • 4 slices whole grain bread (use gluten-free if applicable)
  • 2 tbsp reduced sugar raspberry jam (or jam or choice)
  • 1 1/2 oz goat cheese, at room temperature
  • 2 small handfuls fresh blueberries (preferably organic)
  • 2 oz light brie cheese, sliced, rinds removed

Instructions

  1. Heat a large grill pan, griddle or nonstick pan over medium-low heat.
  2. Spread 2 slices of bread with 1 tbsp each of jam. Spread remaining two pieces with softened goat cheese (evenly divide the 1 1/2 oz between the two slices). Place a handful of blueberries on each goat cheese slice and lightly press the berries into the cheese. Top each with 1 oz sliced brie. Place the jam side on top.
  3. Grill until the bottom is browned, about 5-7 minutes. Flip and continue cooking until both sides are browned and cheese is fully melted, about an other 5-7 minutes. Serve immediately.
3.1
http://www.arismenu.com/drink-dish-red-white-blue-grilled-cheese/

Filed Under: Drink & Dish, Gluten-free, Holiday & Seasonal, Lunch, Sandwiches, savory, Summer · Tagged: 4th of july, blueberries, brie, cheese, dinner, drink and dish, goat cheese, lunch, recipe, summer, vegetarian, video.sandwich

Next Page »
Image Map

Popular Posts

Tart Cherry Margaritas: The perfect, refreshing margarita--lightly sweet with a punch of tequila

Tart Cherry Margaritas

90+ Healthy Recipes for Breakfast, Lunch, Dinner & Dessert

90+ Healthy Recipes for Breakfast, Lunch, Dinner & Dessert

The Ultimate Peanut Butter Cup Brownie Cookies: Rich, fudgy, brownie-like chocolate cookies stuffed with melty peanut butter cups!

Ultimate Peanut Butter Cup Brownie Cookies

Drink & Dish: Cafe Au Lait Cupcakes

Crockpot Chicken Enchilada Soup

Subscribe via Email:

Enter your email address:

Save an additional $30 on Blendtec Factory Recertified Blenders + Free Shipping

Featured Here

recipe redux
Certified Yummly Recipes on Yummly.com

Member Of…

FitFluential Is Fitness Found
AZ Bloggers Network
az 150 photo az150_zpsfb093d32.gif

Archives


Image Map

Copyright © 2023 | Innovative Child Theme by The Pixelista | Built on the Genesis Framework


Loading Comments...