• Going Out
    • Phx Restaurants
    • How To Order At Starbucks
  • Running
    • My Running Story
    • Race Calendar
    • Race Recaps & Results
  • Blogroll
  • Bucket List
  • Video

Ari's Menu

Little changes making a big difference.

  • Home
  • Recipes
  • Weight Loss
    • My Story
    • Common Swaps
  • Who’s Who
  • Contact
    • Policies & Disclosure
  • Press

Banana Bread Smoothie

April 26, 2015 · by Ari · 9 Comments

Rich and creamy banana bread smoothie

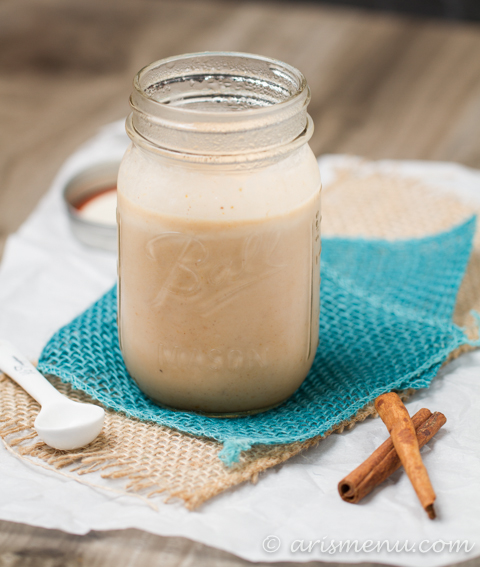
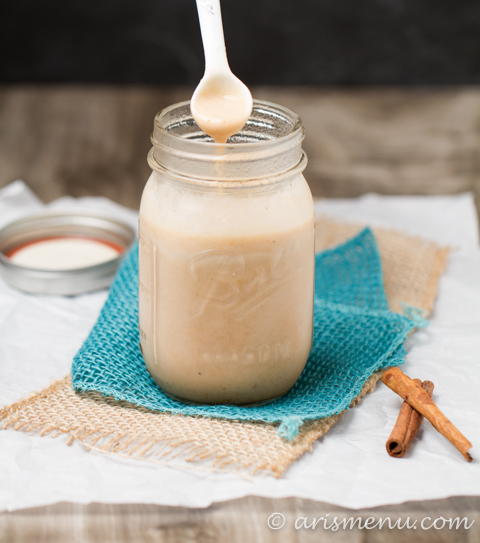
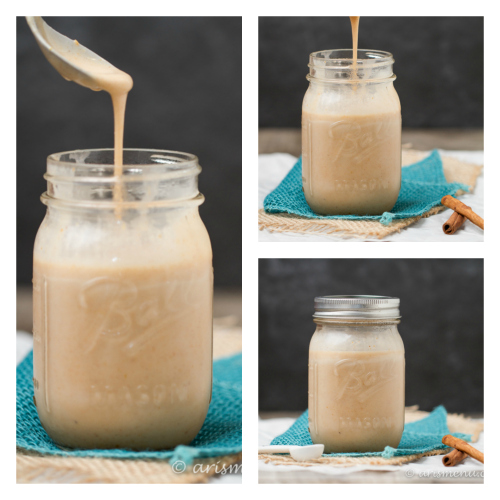
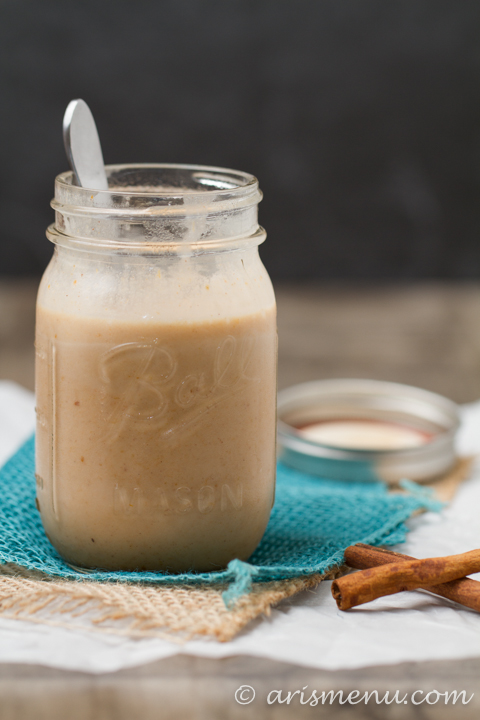
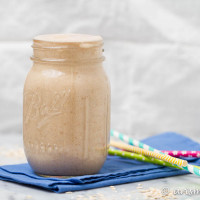
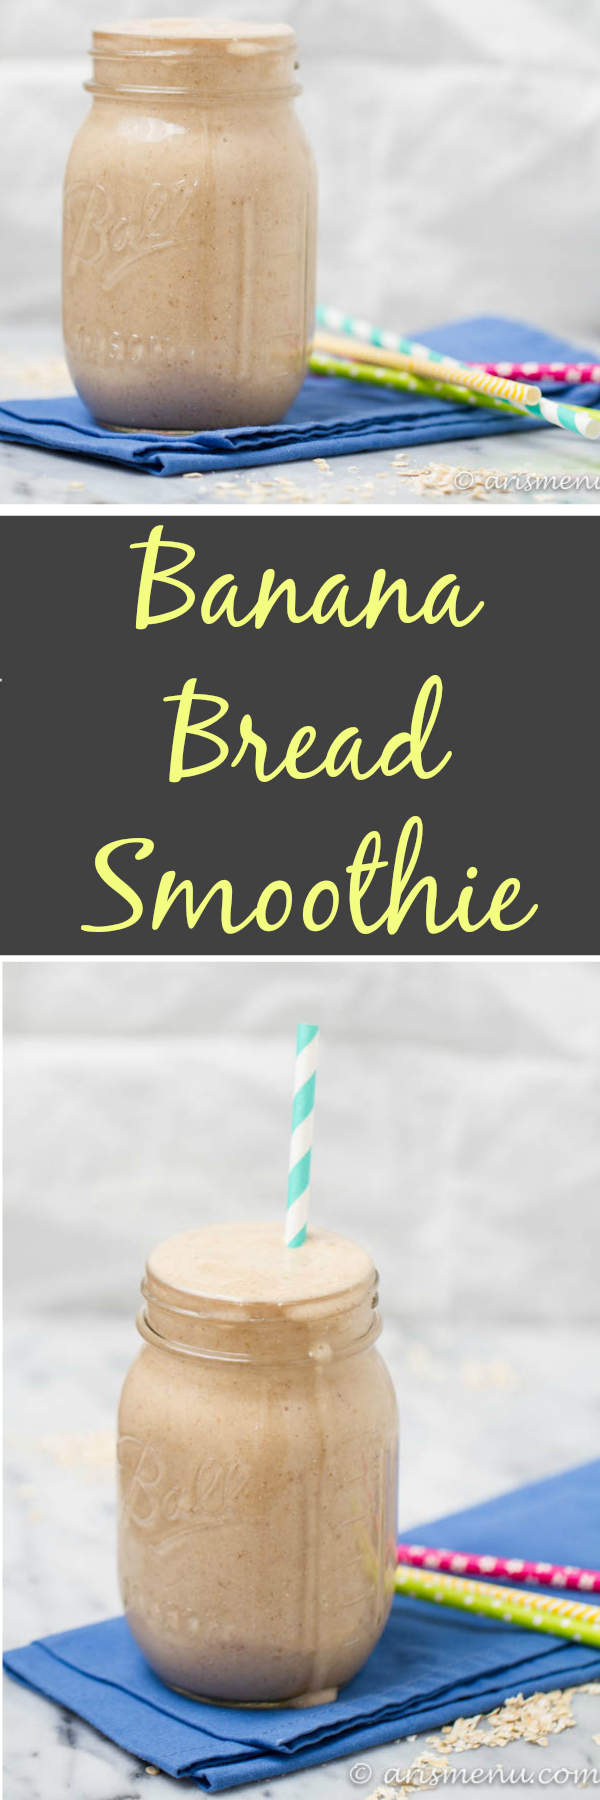
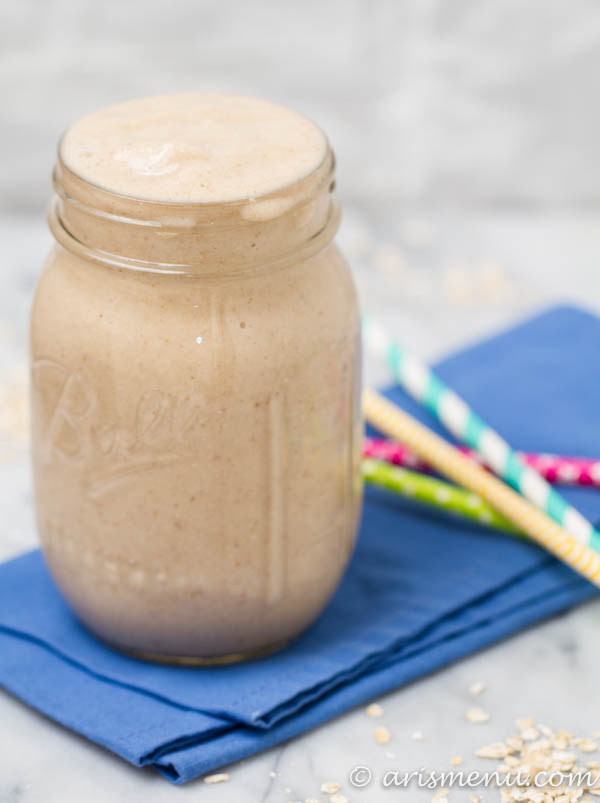
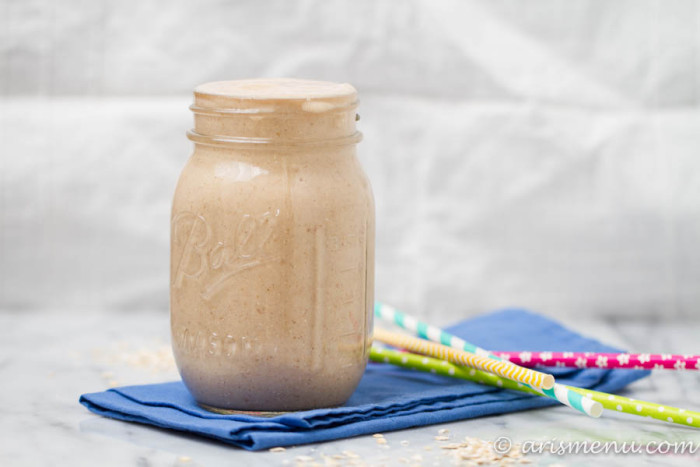
This thick and creamy banana bread smoothie tastes like a milkshake, but it’s naturally light, vegan and gluten-free. 

Rich and creamy banana bread smoothie

Sponsored Post

Summer is coming. I know those of you that don’t live in Arizona are super excited that it’s finally Spring but, here in Phoenix, it’s been Spring since about November and the summer temps are taunting us. In fact, next week it’s already supposed to hit 100 degrees. Wahhhhh.

Rich and creamy banana bread smoothie

This will be the first summer in a long time that I’m not training for a marathon (I trained for the New York marathon 3 years in a row and finally crossed the finish line last year!), but it will also be the first summer in an even longer time that I am staying in Phoenix almost the entire summer. I’m kind of terrified. And even though I’m not training for a marathon, I do have to keep training for the Bourbon Chase which means 90 degree runs at 4am and plenty of ice cold smoothies immediately to follow.

Rich and creamy banana bread smoothie

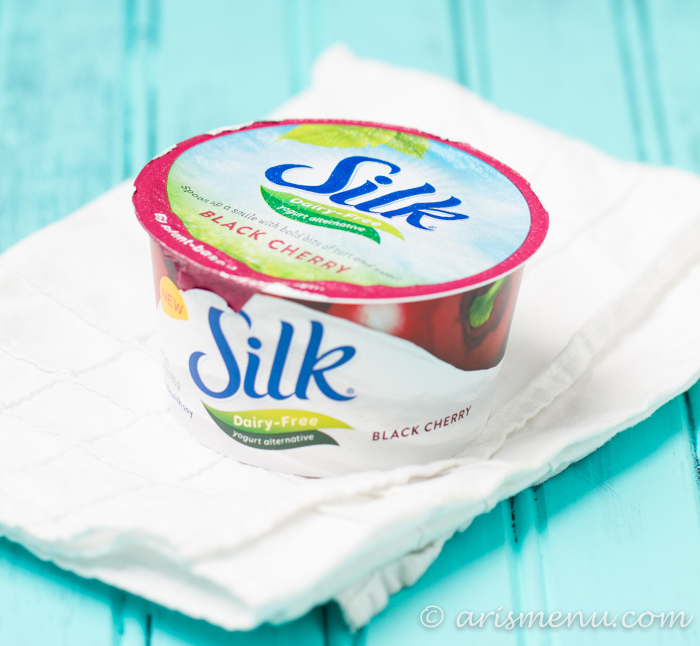
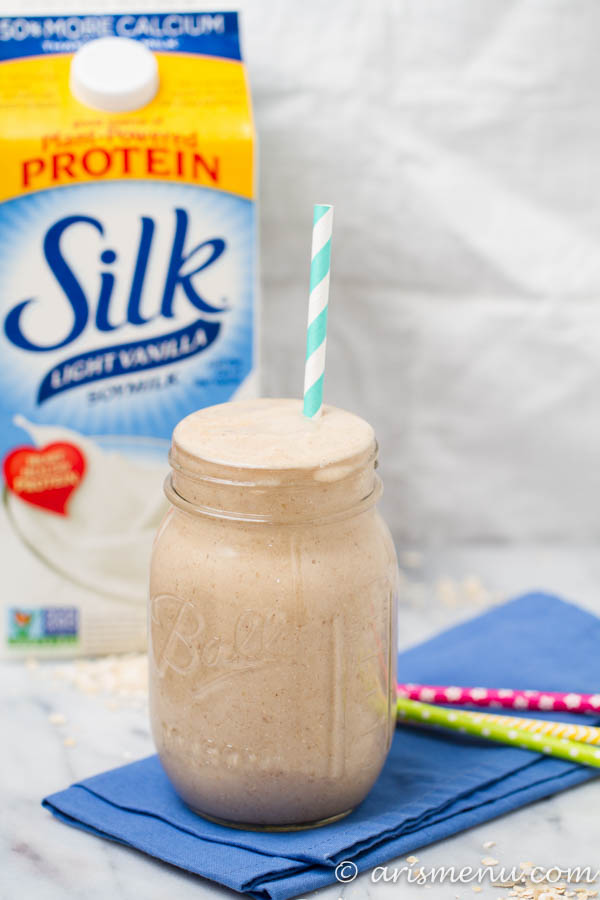
I have a confession: I know I’ve mentioned this before, but I’m not into protein powder. I know most of the healthy living community likes to put protein powder in their smoothies, but I just prefer to get my protein from foods that already contain it. The cup of Silk soy milk I used in this recipe has 8 grams of plant based protein, and often times I’ll beef that up with some nonfat plain Greek yogurt, but this recipe is so smooth and creamy without it, plus I wanted to keep it vegan and dairy free.

Rich and creamy banana bread smoothie

You can get an extra protein boost from lots of soy products–tofu, edamame and more will bulk up the protein in your diet. And this smoothie? You will fall in love with how creamy, dreamy and delicious it is. The oats and frozen banana give it the flavor of freshly baked banana bread, and the dates add a little extra sweetness naturally.

5.0 from 1 reviews
Print
Banana Bread Smoothie
Author: Ari Ziskin
Recipe type: Breakfast
Prep time:  5 mins
Total time:  5 mins
Serves: 1
 
This thick and creamy banana bread smoothie tastes like a milkshake, but it's naturally light, vegan and gluten-free.
Ingredients
  • 1 cup Silk soy milk (I used light vanilla)
  • 2 dates, pitted
  • 1 banana, peeled and frozen
  • ¼ cup oats (use certified gluten-free if necessary)
  • 1 cup ice
  • ½ teaspoon vanilla extract
  • ½ teaspoon ground cinnamon
Instructions
  1. Soak dates in soy milk covered in your refrigerator for 30-60 minutes. Blend all ingredients in a high quality blender until smooth. If smoothie is too thick, add a little more soy milk. Drink immediately.
3.2.2885

Make sure to check out Silk’s website to get a coupon and fall back in love with soy yourself!

This conversation is sponsored by Silk. The opinions and text are all mine.

Filed Under: Breakfast, Dairy Free, Drinks, Gluten-free, Holiday & Seasonal, Smoothies & Shakes, Snacks, Summer, Vegan · Tagged: banana, dairy free, gluten free, silk, smoothie, soy, soy milk, vegan

Breakfast Stuffed Sweet Potatoes

March 16, 2015 · by Ari · 4 Comments

Breakfast Stuffed Sweet Potatoes: Healthy, delicious and naturally paleo

Whether it’s breakfast for dinner or dinner for breakfast, these perfectly roasted breakfast stuffed sweet potatoes filled with drippy eggs, crispy bacon and a drizzle of maple syrup are sure to impress!

Breakfast Stuffed Sweet Potatoes: Healthy, delicious and naturally paleo

Sponsored Post

Okay so don’t think I’m weird because I love maple syrup on my bacon and eggs. My favorite thing is a stack of fluffy pancakes with drippy eggs, crispy bacon and real maple syrup. The sweet and salty together…sooo good.

Breakfast Stuffed Sweet Potatoes: Healthy, delicious and naturally paleo

My other favorite thing? Stuffed sweet potatoes. Obviously. And what better to stuff them with when ya want something a little different than some protein-packed eggs? I love eggs. They are pretty much the cheapest and easiest way to instantly bulk up the protein in any dish.

For this dish, I used more of my Eggland’s Best eggs. I’m super into them. Compared to regular eggs, Eggland’s Best eggs have 25% less saturated fat, 1o x more vitamin E, 4 x more vitamin D and 3 x more vitamin B12. Whoa! For more information on their nutrition, check out their nutrition info. I’m sold!

Breakfast Stuffed Sweet Potatoes: Healthy, delicious and naturally paleo

I usually eat this as breakfast for dinner, but it totally works as a super filling breakfast–especially  if you roast the sweet potatoes and cook your bacon ahead of time. With just a handful of ingredients, it’s naturally paleo, gluten-free and dairy-free. And the perfect bite of sweet and salty deliciousness.

Print
Breakfast Stuffed Sweet Potatoes
Author: Ari Ziskin
Recipe type: Entree
Prep time:  5 mins
Cook time:  1 hour
Total time:  1 hour 5 mins
Serves: 2
 
Whether it's breakfast for dinner or dinner for breakfast, these perfectly roasted breakfast stuffed sweet potatoes filled with drippy eggs, crispy bacon and a drizzle of maple syrup are sure to impress!
Ingredients
  • 2 small sweet potatoes
  • 1 tablespoon olive oil
  • coarse sea salt
  • 3 slices center cut bacon, cooked and crumbled
  • 4 eggs, cooked to your liking (I did over medium)
  • pure maple syrup for drizzling, optional
Instructions
  1. Preheat oven to 400. Use a fork to poke several holes into sweet potatoes. Brush each sweet potato with approx ½ tablespoon of olive oil and sprinkle to coat lightly with sea salt. Roast until fork tender (meaning a fork easily slides right into the sweet potato), about 45-60 minutes depending on size of your potatoes.
  2. Once your potatoes have cooked, cook up your eggs. Slice cooked sweet potatoes down the middle leaving about an inch uncut. Stuff each potato with 2 eggs and a generous pinch of crumbled bacon. Drizzle with maple syrup of desired (you only need a small amount) and serve immediately
3.2.2885


This post is sponsored by FitFluential on behalf of Eggland’s Best.

Filed Under: Breakfast, Dairy Free, Dinner, Eggs, Entree, Gluten-free, Lunch, Paleo, savory · Tagged: breakfast, breakfast for dinner, center cut bacon, dairy free, easy dinner, eggs, gluten free, paleo, sweet potato, sweet potato breakfast

Crockpot Raspberry Chipotle Chicken

March 2, 2015 · by Ari · 5 Comments

Crockpot Raspberry Chipotle Chicken: Perfectly tender and juicy shredded chicken with a sweet and spicy kick!

Crockpot raspberry chipotle chicken is the perfect juicy, tender shredded chicken that’s lightly sweet with a spicy kick! Just 3 ingredients and no prep time make it so fast and easy! Great for salads, sandwiches, or a fork.

Crockpot Raspberry Chipotle Chicken: Perfectly tender and juicy shredded chicken with a sweet and spicy kick!

One of my favorite meal prep options is crockpot shredded chicken. Almost every week I make some variety of chicken in the crockpot to bring for lunches, and somehow I’m still not sick of it. Probably because I’m always changing it up and trying new things, but I have to tell you this was one of my favorites.

Crockpot Raspberry Chipotle Chicken: Perfectly tender and juicy shredded chicken with a sweet and spicy kick!

One of my favorite lunch spots is Costa Vita because they have this amaaaaazing raspberry chipotle chicken salad. I love the sweet and spicy combination and raspberry and chipotle just go together like pb&j.

Crockpot Raspberry Chipotle Chicken: Perfectly tender and juicy shredded chicken with a sweet and spicy kick!

This is a great meal prep option because you can use it so many different ways–you don’t just eat the same thing day after day. I suggest making sandwiches, a taco-type salad, and maybe even stuffing a spaghetti squash! Although, I have to admit, I ate the majority with just a fork. 😉

Print
Crockpot Raspberry Chipotle Chicken
Author: Ari Ziskin
Recipe type: Entree
Prep time:  5 mins
Cook time:  5 hours
Total time:  5 hours 5 mins
Serves: 10-12
 
Crockpot raspberry chipotle chicken is the perfect juicy, tender shredded chicken that's lightly sweet with a spicy kick! Great for salads, sandwiches, or a fork!
Ingredients
  • 4 large chicken breasts
  • 1 x 7 ounce can chipotle peppers in adobo sauce
  • 1 cup raspberry jam
Instructions
  1. Layer chicken in the bottom of your slow cooker. Cover with chipotle peppers (and sauce) and raspberry jam. Cook on low for 5 hours. Shred chicken and stir into sauce. Serve immediately or refrigerate in an airtight container for 5-7 days.
3.2.2885


Filed Under: Chicken, Dairy Free, Dinner, Entree, Gluten-free, Lunch, savory, Slow Cooker · Tagged: chicken, chipotle, chipotle in adobo, crockpot, crockpot chicken, dairy free, easy crockpot recipe, easy dinner, gluten free, grain free, raspberry, raspberry chipotle, slow cooker, slow cooker chicken, sweet and spicy chicken

Honey Sriracha Skillet Pork Chops

January 22, 2015 · by Ari · 12 Comments

Easy, healthy & delicious one pan Honey Sriracha Skillet Pork Chops

Sweet and spicy honey sriracha skillet pork chops are so easy and flavorful with only a handful of ingredients, and one pan. Get rid of the idea that healthy food has to be bland or complicated–this dinner is so easy and delicious, you will make it over and over again!

Easy, healthy & delicious one pan Honey Sriracha Skillet Pork Chops


So when I discover something I like, I get on this kick where I have to do that same thing in, like, every single way imaginable. I like mac and cheese, so clearly it is my goal in life to develop every type of mac and cheese that could ever be even remotely delicious. Ever.

Honey Sriracha Skillet Pork Chops Recipe

That’s how it is with me and the cast iron lately. Specifically with really, super, ridiculously easy meat dishes that start on the stove top to get that perfect sear, then transfer to the oven to keep cooking without drying out. It’s just so perfect, and it’s only one dish! It’s basically my favorite. Well, the crockpot is up there too. 😉

Easy, healthy & delicious one pan Honey Sriracha Skillet Pork Chops

Ever since I made this chicken, I’ve been a woman obsessed, and that cast iron has gotten more use than ever before. It is so easy to create delicious, flavorful food because the cast iron has magical powers where it locks in all the flavor, and makes everything better.

Easy, healthy & delicious one pan Honey Sriracha Skillet Pork Chops

These pork chops are cooked super simply–just coconut oil, honey, Sriracha and pepper. Yes, that’s 5 ingredients including pepper. And the perfect combination of sweet and spicy.

Easy, healthy & delicious one pan Honey Sriracha Skillet Pork Chops

I just love the way spicy foods add so much flavor to a dish, and keep healthy eating exciting! That’s why I was so stoked when this month’s theme of The Recipe ReDux was all about spice. These pork chops deliver the perfect punch, with minimal effort. Win, win.

5.0 from 3 reviews
Print
Honey Sriracha Skillet Pork Chops
Author: Ari Ziskin
Recipe type: Entree
Prep time:  5 mins
Cook time:  25 mins
Total time:  30 mins
Serves: 4
 
Sweet and spicy honey sriracha skillet pork chops are so easy and flavorful with only a handful of ingredients, and one pan. Get rid of the idea that healthy food has to be bland or complicated--this dinner is so easy and delicious, you will make it over and over again!
Ingredients
  • 1 tablespoon coconut oil (enough to coat the pan--more or less is fine)
  • 4 large pork loin chops
  • generous pinch black pepper
  • 1 tablespoon good quality honey
  • 1 tablespoon Sriracha
Instructions
  1. Preheat oven to 350. Heat coconut oil over medium heat in an oven-proof skillet, preferably cast iron. Season chops with pepper only (I found that salting them made the entire dish taste like salt) and brown in your skillet, about 3-5 minutes per side. You will know pork is ready to be turned when it easily releases from the pan. If you're having trouble, let it continue to cook. It will release when it's browned and ready. Add honey and Sriracha.
  2. Transfer skillet to the oven and bake until pork is cooked through and juices run clear, about 15 minutes. Stir around the juices on the bottom of the pan to mix the pork renderings, coconut oil, honey and Sriracha all together. Serve immediately. I suggest spooning a little bit of the extra liquid on top. Leftovers may be refrigerated in an airtight container for 5-7 days.
3.2.2885

 Loading InLinkz ...

Filed Under: Dinner, Entree, Gluten-free, Low Carb, Paleo, Pork, savory · Tagged: cast iron, cast iron pork chops, dairy free, gluten free, honey, honey pork chops, paleo, pork, pork chops, sriracha, sriracha pork chops

Chocolate Covered Cherry Smoothie

January 12, 2015 · by Ari · 3 Comments

Chocolate Covered Cherry Smoothie A healthy, sweet and creamy vegan breakfast option!

This creamy, vegan chocolate covered cherry smoothie is a healthy breakfast option that tastes like dessert. In just 2 minutes, you can have a healthy, filling breakfast that you will be excited to eat!

Chocolate Covered Cherry Smoothie A healthy, sweet and creamy vegan breakfast option!

Sponsored Post

Chocolate for breakfast!!! Chocolate for snack!! Chocolate for all the time.

Chocolate Covered Cherry Smoothie A healthy, sweet and creamy vegan breakfast option!

One day I came home from a run, and I threw all of my stuff into the blender to make a huge, cold smoothie. Then, on a whim I threw in some chocolate chips. Now I can’t make a smoothie without chocolate chips. It’s kind of a problem. Except it’s not, because it’s delicious.

Chocolate Covered Cherry Smoothie A healthy, sweet and creamy vegan breakfast option!

I have to admit, when I first found out about the new Silk Dairy-Free Yogurt Alternative, I was totally skeptical. I mean, I loooove my Silk, and buy their products all the time, but I am a Greek yogurt girl at heart, and I wasn’t sure how this could possibly compare. While I have to admit that I would still consider myself a Greek yogurt girl, this new dairy-free yogurt alternative was actually great! It didn’t taste fake, and it was much thicker than I had expected.

Chocolate Covered Cherry Smoothie A healthy, sweet and creamy vegan breakfast option!

I’m not typically a fan of things that aren’t what you want them to be. I don’t do fake meat, and I would rather not eat cheese than eat anything resembling fake cheese (unless it’s like a creamy nut based cheese sauce–that’s an other story, and a totally different form of delicious!), but that’s what I love about this new product–it’s not trying to be yogurt. It’s an alternative. It contains 6 grams of plant-based protein, and it has all the creamy, deliciousness you’re looking for. It is also made with real fruit, along with being dairy-free, cholesterol-free, gluten-free, carrageenan-free, vegetarian, healthy, and totally delicious. That’s a lot of info. Here’s what you really need to know: It’s legit.

Chocolate Covered Cherry Smoothie A healthy, sweet and creamy vegan breakfast option!

I love making smoothies, and this is the first time I’ve been able to make one that my vegan friends can enjoy too! I’m so grateful that Silk put this awesome Dairy-Free Yogurt Alternative on the market!

Print
Chocolate Covered Cherry Smoothie
Author: Ari Ziskin
Recipe type: Breakfast
Prep time:  2 mins
Total time:  2 mins
Serves: 1
 
This creamy, vegan chocolate covered cherry smoothie is a healthy breakfast option that tastes like dessert. In just 2 minutes, you can have a healthy, filling breakfast that you will be excited to eat!
Ingredients
  • 1 frozen banana
  • ¼ cup Silk Black Cherry Dairy-Free Yogurt Alternative
  • 2 handfuls ice
  • 1 tablespoon dark chocolate chips
  • 1 cup unsweetened almond milk*
  • generous pinch chia seeds, optional
Instructions
  1. Place all ingredients in a blender, and blend until smooth. Serve immediately.
Notes
*You may wish to start with ¾ cup almond milk and add more depending on your desired thickness
3.2.2885

To find out about more amazing products and promotions, check out the Silk newsletter, or follow along on Facebook, Instagram, Twitter and Pinterest!


This conversation is sponsored by Silk. The opinions and text are all mine.

Filed Under: Breakfast, Drinks, Gluten-free, Smoothies & Shakes, Snacks, Summer, Vegan, Vegetarian · Tagged: black cherry, cherry, dairy free, dairy free yogurt, silk dairy free yogurt alternative, smoothie, vegan, vegan recipes, yogurt alternative

Bacon Brussels Sprouts Risotto

December 18, 2014 · by Ari · 4 Comments

Bacon Brussels Sprouts Risotto: Creamy and smokey--the perfect meal for entertaining!

This post is sponsored by  Swanson®. All opinions are my own.

Bacon brussels sprouts risotto is so rich, creamy and comforting. Filled with smokey bacon flavor, seared brussels sprouts and creamy, tender rice; this will instantly become your new favorite dinner!

Bacon Brussels Sprouts Risotto: Easy, fail-proof, flavor rich risotto with smokey bacon and plenty of delicious brussels sprouts. This dish appears fancy, but is actual super easy, making it perfect for entertaining!

I’ve had a long standing battle with cooking rice. I know, I know….I can make macarons, but I can’t make rice. I guess we all have our things? Also, I almost always burn popcorn. Finally, I developed a risotto recipe so fool proof even I can’t mess it up, which means you are golden. 😉

Bacon Brussels Sprouts Risotto: Easy, fail-proof, flavor rich risotto with smokey bacon and plenty of delicious brussels sprouts. This dish appears fancy, but is actual super easy, making it perfect for entertaining!

Okay, let’s talk about brussels sprouts for a hot second because so many people think they hate them, but I think that they just haven’t had them cooked well. For the longest time, I was not into brussels sprouts. So often they aren’t tender enough for my taste. I want a crisp sear, then a melt in your mouth softness. Have you ever had steamed brussels sprouts? OMG The.Worst. These babies are nothing like that, and by cooking them with bacon and hiding them in carbs, this is the perfect opportunity to convince even your toughest critics.

Bacon Brussels Sprouts Risotto: Easy, fail-proof, flavor rich risotto with smokey bacon and plenty of delicious brussels sprouts. This dish appears fancy, but is actual super easy, making it perfect for entertaining!

Risotto is so creamy that most people think it’s made with butter and cream, but I just use a little white wine and a whole lotta chicken broth, and allow the starches in the rice to naturally develop and create that beautifully creamy texture.

Bacon Brussels Sprouts Risotto: Easy, fail-proof, flavor rich risotto with smokey bacon and plenty of delicious brussels sprouts. This dish appears fancy, but is actual super easy, making it perfect for entertaining!

Bacon Brussels Sprouts Risotto: Easy, fail-proof, flavor rich risotto with smokey bacon and plenty of delicious brussels sprouts. This dish appears fancy, but is actual super easy, making it perfect for entertaining!

Risotto is known for being difficult and time consuming, but honestly it just requires a little bit of patience, and you can multi-task by cooking your bacon and brussels sprouts at the same time as your risotto.

Bacon Brussels Sprouts Risotto: Easy, fail-proof, flavor rich risotto with smokey bacon and plenty of delicious brussels sprouts. This dish appears fancy, but is actual super easy, making it perfect for entertaining!

You’ll notice I don’t add a single spice or seasoning in this recipe. That’s because the Swanson® Tuscan Chicken Flavor Infused Broth, along with the smokey bacon add so much flavor on their own, there is just no need for it. I’m usually all about adding everything but the kitchen sink into my recipes, but this one just doesn’t need anything extra.

Bacon Brussels Sprouts Risotto: Easy, fail-proof, flavor rich risotto with smokey bacon and plenty of delicious brussels sprouts. This dish appears fancy, but is actual super easy, making it perfect for entertaining!

If you want to impress your holiday guests, this is definitely the dish for you!

Print
Bacon Brussels Sprouts Risotto

Prep Time: 15 minutes

Cook Time: 45 minutes

Total Time: 1 hour

Yield: 4 servings

Bacon Brussels Sprouts Risotto

Bacon brussels sprouts risotto is so rich, creamy and comforting. Filled with smokey bacon flavor, seared brussels sprouts and creamy, tender rice; this will instantly become your new favorite dinner!

Ingredients

  • 3 tablespoons olive oil, divided*
  • 2 cloves garlic, minced
  • 1/2 sweet onion, finely chopped
  • 1 cup arborio rice
  • 1/2 cup dry white wine (or replace with extra chicken broth if you don't use alcohol)
  • 32 ounces Swanson® Tuscan Chicken Flavor Infused Broth
  • 1 cup brussels sprouts, halved, stems removed, extra leaves reserved**
  • 4 slices center cut bacon, chopped

Instructions

  1. Coat a large pan with olive oil (this should be about 2 tablespoons) and heat over medium low heat. Add garlic and onion and toss until fragrant, about 3 minutes. Add in rice and toss until browned, about 5-10 minutes. Add wine and stir to combine.
  2. Coat a medium pan with olive oil (this will be about 1 tablespoon) and heat over medium heat. Place brussels sprouts flat side down and cook until bottom is browned and crispy, about 5-10 minutes. Once browned, flip and push to one side of the pan and add chopped bacon to the other. Cook until bacon is browned, tossing both the bacon and the brussels sprouts often. Once bacon is cooked toss bacon and brussels sprouts together and add reserved brussels sprouts leaves. Reduce heat to low and cook until leaves are browned, tossing occasionally.
  3. While the brussels sprouts are browning, add chicken broth 1/2 cup at a time, stirring until fully incorporated, reserving about 1/4 cup from your 32 ounce container. Once all broth (except for reserved 1/4 cup) has been incorporated, add cooked bacon and brussels sprouts.
  4. Deglaze the bacon and brussels sprouts pan by pouring in reserved chicken broth. Increase heat to medium high, and use a spatula to scrape up all of the browned bits left over from the bacon and brussels sprouts. Pour into risotto and stir until fully incorporated. Serve immediately. Leftovers may be stored in an airtight container for up to one week.

Notes

*Olive oil just needs to coat the bottom of each pan. You do not need an exact measurement. **As you slice your brussels sprouts, some extra leaves will fall off. You want to save those because they cook faster and add them in later in the cooking process. ***This recipe is best cooked in stainless steel cookware.

3.1
http://www.arismenu.com/bacon-brussels-sprouts-risotto/

This blog post is sponsored by Swanson®.

width=”1″ height=”1″ />

Filed Under: Appetizers, Dinner, Entree, Fall, Gluten-free, Holiday & Seasonal, savory, Winter · Tagged: bacon, brussels sprouts, dairy free, entertaining, risotto

Creamy Thai Ginger Skillet Chicken

December 15, 2014 · by Ari · 4 Comments

Creamy Thai Ginger Skillet Chicken: You will love all of the bold flavor this one skillet dish brings!

This post is sponsored by  Swanson®. All opinions are my own.

Creamy Thai ginger skillet chicken with perfectly browned, juicy chicken thighs and a creamy Thai ginger sauce. One pan, tons of flavor.

Creamy Thai Ginger Skillet Chicken: You will love all of the bold flavor this one skillet dish brings!

This chicken.

Me: What do you think I should say about the chicken?

Steve: (in a weird, high, sing-song voice) La da da da da chicken is goooood! I like chicken!

Creamy Thai Ginger Skillet Chicken: You will love all of the bold flavor this one skillet dish brings!

Ummmm, yeah. But, I have to tell you that he was super excited about it when he came home for dinner the other night. You see, using chicken thighs is a pretty rare treat in this house. I just honestly prefer white meat 95% of the time, but when I was at the store grabbing my ingredients, the chicken thighs just spoke to me, so I went with it.

Creamy Thai Ginger Skillet Chicken: You will love all of the bold flavor this one skillet dish brings!

My mom always complains about cooking chicken. She says that, no matter what she does, it turns out dry. Usually I just make Steve grill up all the meat because I’m not  super into cooking meat. I love to eat it, but I don’t necessarily feel like it’s my forte, so I was really pleasantly surprised when this chicken turned out just as I had imagined it in my head; better even!

Creamy Thai Ginger Skillet Chicken: You will love all of the bold flavor this one skillet dish brings!

The bold and creamy sauce is to.die.for. I kept trying to spoon more out over my chicken, and I wished I had a big plate o’ carbs to soak it up with. I hardly had to use any seasonings because the Swanson®  Thai Ginger Flavor Infused Broth was so flavorful, and brought so much to the table!

Creamy Thai Ginger Skillet Chicken: You will love all of the bold flavor this one skillet dish brings!

The chicken is first browned on the stovetop in a little coconut oil, then transferred to the oven to cook throughout. Browning on the stove, and then baking allows the best browned outside while still keeping the inside soft and juicy. Then you just add in your sauce ingredients right into your skillet, and scrape up some of the extra flavor from the bottom of the skillet, and boom! You’ve got a new, amazing, and unique dish to serve to your friends and family this holiday season. You won’t regret trying something new, and your family will appreciate this unique dish year round!

Print
Creamy Thai Ginger Skillet Chicken

Prep Time: 5 minutes

Cook Time: 30 minutes

Total Time: 35 minutes

Yield: 3 servings

Serving Size: 1 chicken thigh

Creamy Thai Ginger Skillet Chicken

Creamy Thai ginger skillet chicken with perfectly browned, juicy chicken thighs and a creamy Thai ginger sauce. One pan, tons of flavor.

Ingredients

  • 1 tablespoon coconut oil
  • 1 pound boneless skinless chicken thighs, fat trimmed (about 3 medium)
  • pinch pepper
  • 1/4 cup Swanson® Thai Ginger Flavor Infused Broth
  • 1/4 cup canned coconut milk
  • pinch turmeric
  • dash cumin
  • Sriracha for drizzling (optional)
  • fresh cilantro for serving (optional)

Instructions

  1. Preheat oven to 350. Heat coconut oil over medium heat in an oven-proof skillet, preferably cast iron. Season chicken breasts with pepper only (I found that salting them made the entire dish taste like salt) and brown in your skillet, about 3-5 minutes per side. You will know chicken is ready to be turned when it easily releases from the pan. If you're having trouble, let it continue to cook. It will release when it's browned and ready.
  2. Transfer skillet to the oven and bake until chicken is cooked through and juices run clear, about 15 minutes.
  3. Return to stove and, over medium low heat, pour in broth, coconut milk, turmeric and cumin. Use a wooden spoon to stir, scraping up all the browned bits from the bottom of the pan and incorporating them into your sauce. Serve with a drizzle of sriracha and fresh cilantro. Make sure you spoon extra sauce onto that chicken for serving--it's the best part! Leftovers may be refrigerated in an airtight container for 5-7 days.
3.1
http://www.arismenu.com/creamy-thai-ginger-skillet-chicken/

This blog post is sponsored by Swanson®.

Filed Under: Chicken, Dinner, Entree, Gluten-free, Paleo, savory · Tagged: 1 pan, chicken, coconut milk, dairy free, entree, gluten free skillet chicken, skillet, thai

Pumpkin Spice Sweetened Condensed Coconut Milk

October 1, 2014 · by Ari · 16 Comments

Pumpkin Spice Sweetened Condensed Coconut Milk

Homemade sweetened condensed milk made with coconut milk, maple syrup, pumpkin puree and warm fall spices. Perfect as a coffee creamer, or to replace sweetened condensed milk in any recipe. Naturally sweetened, vegan, paleo & gluten-free.

Pumpkin Spice Sweetened Condensed Coconut Milk: Perfect for coffee creamer or to replace sweetened condensed milk in any recipe! Vegan, paleo & refined sugar free.

Guess what, guess what, guess whaaaaaaatttttt? It’s finally starting to feel like fall here in Phoenix! After months of running in nothing cooler than 80 degrees (even when you wake up at 4am) and insane humidity (ummm…that “dry heat” thing? it’s not), temperatures are finally dropping and there is a morning chill in the air! I FREAKING LOVE MORNING CHILL!!

Pumpkin Spice Sweetened Condensed Coconut Milk: Perfect for coffee creamer or to replace sweetened condensed milk in any recipe! Vegan, paleo & refined sugar free.

In fact, yesterday I was cold at the beginning of my bike ride. Like, I thought about changing into long sleeves. I seriously could not be happier. Weather isn’t the biggest deal in the world normally, but when you’re training for a fall marathon and you live in Phoenix, you start to live and die by the weather forecast. I stalk it daily and check out the 10 day forecast every single day. In fact, today was the first day I was able to see far enough ahead for my 20 miler, and while it still will probably change before then, it’s crazy how close it is, and how close I am to being finished with training.

Pumpkin Spice Sweetened Condensed Coconut Milk: Perfect for coffee creamer or to replace sweetened condensed milk in any recipe! Vegan, paleo & refined sugar free.

Marathon training is so weird. You finish your training (other than taper) 3 weeks before the race, so it still doesn’t even seem like the race is close, but then all of the sudden you’re done, and you wonder where all the time went. It feels like things just started to get real, and so soon they will be over, and even though I’ve insisted this whole training cycle that I will never run an other marathon after this, I’m already starting to feel sad about it ending.

Pumpkin Spice Sweetened Condensed Coconut Milk: Perfect for coffee creamer or to replace sweetened condensed milk in any recipe! Vegan, paleo & refined sugar free.

One of my favorite things to do when I have an off day is spend the time I would be running creating something delicious / cool / unique / outside of what I would normally make on a daily basis. I love the extra time to be creative and try new things, and this time I returned to my homemade sweetened condensed milk obsession. The last time it came out so ridiculously good that I couldn’t wait to play with it, and make a flavored option.

Pumpkin Spice Sweetened Condensed Coconut Milk: Perfect for coffee creamer or to replace sweetened condensed milk in any recipe! Vegan, paleo & refined sugar free.

The best part? This recipe is so, so, so easy, and you can use it tons of different ways. Have a recipe that calls for sweetened condensed milk? Sub this seasonal, vegan & paleo version. Use it as creamer in iced coffee, drizzle some on your favorite fruit for dessert, make tres leches cake (<— umm, that is happening soon), or just eat it with a spoon because it’s that good.

Print
Pumpkin Spice Sweetened Condensed Coconut Milk

Prep Time: 5 minutes

Cook Time: 30 minutes

Total Time: 1 hour

Yield: approximately 1 cup

Pumpkin Spice Sweetened Condensed Coconut Milk

Ingredients

  • 1 x 13.5 ounce can full fat coconut milk
  • 1 teaspoon pumpkin pie spice
  • 3-4 tablespoons pure maple syrup
  • 2 tablespoons pumpkin puree

Instructions

  1. Heat coconut milk, pumpkin pie spice and maple syrup together in a medium sized pot over medium-high heat until it starts to lightly boil. Reduce heat to a medium to medium-low simmer whisking constantly until mixture thickens and reduces to about one half to one third of original. This takes about 30 minutes. When milk is finished, it will coat the back of a spoon. It will continue to thicken as it cools. Whisk in pumpkin puree, then let cool completely, stirring occasionally. Store in an airtight container in the refrigerator for up to 2 weeks.
3.1
http://www.arismenu.com/pumpkin-spice-sweetened-condensed-coconut-milk/

Filed Under: Dessert, DIY/How To, Gluten-free, Holiday & Seasonal, Paleo, Vegan · Tagged: coconut milk, dairy free, fall, gluten free, paleo, pumpkin, pumpkin spice, refined sugar free, sweetened condensed milk, vegan sweetened condensed milk

Crockpot Curry Soup with Sweet Potato, Chicken & Kale

September 28, 2014 · by Ari · 19 Comments

Crockpot Curry Soup with Sweet Potato, Chicken & Kale

Rich, creamy, warm and comforting curry soup with sweet potatoes, chicken & kale is incredibly easy to make in your slow cooker with NO prep time! Healthy, paleo, gluten-free & dairy-free.

Crockpot Curry Soup with Sweet Potato, Chicken & Kale: NO prep time, healthy, paleo, gluten-free & dairy-free

Can we talk for a second about trying to make curry soup look pretty? I mean, it’s YELLOW and the sweet potatoes I used were yellow. Side note: I totally prefer the lighter colored sweet potatoes, you? The first time I used them I thought they were mislabeled because for most of my life I knew nothing about vegetables. Anyway, I love them, and I think they are sweeter and softer than the orange ones.

Crockpot Curry Soup with Sweet Potato, Chicken & Kale

Oh, and ummm cooked kale? The ugliest. If this soup weren’t so freaking delicious, I would have said F it, called it quits, and just pouted while sadly eating straight from the crockpot. Seriously, it’s super fun to live with a food blogger who gets super grouchy when things don’t go her way. The other night I had a melt down because I took like 5 zillion pictures of steam coming off my mac & cheese only to realize the wine glass I had set in the background was still empty. Life is hard sometimes.

Crockpot Curry Soup with Sweet Potato, Chicken & Kale

Anyway, this soup was totally worth it, pretty or not. With the bold curry flavor, the creamy coconut milk and my very favorite food (sweet potatoes, in case you’re new here), you really can’t go wrong. The chicken cooks up perfectly in the crockpot with extra work involved, and the kale adds a little nutrient + flavor bonus. I love kale. I’m such a cliche.

Crockpot Curry Soup with Sweet Potato, Chicken & Kale

This soup is perfect for the busy fall months when you want something delicious and warm waiting for you when you come home–it makes weeknight dinners a breeze, and it tastes way more indulgent than it actually is, so it’s a win-win!

Print
Crockpot Curry Soup with Sweet Potato, Chicken & Kale

Prep Time: 5 minutes

Cook Time: 5 hours

Total Time: 5 hours, 5 minutes

Yield: 6-8 servings

Crockpot Curry Soup with Sweet Potato, Chicken & Kale

Rich, creamy, warm and comforting curry soup with sweet potatoes, chicken & kale is incredibly easy to make in your slow cooker with NO prep time! Healthy, paleo, gluten-free & dairy-free.

Ingredients

  • 2 medium sweet potatoes
  • 2 large chicken breasts
  • 2 small onions, diced
  • 2 big handfuls kale
  • 3 cloves garlic, minced
  • 2 x 13.5 ounce cans coconut milk
  • 32 ounces chicken broth
  • 1 1/2 tablespoons curry paste
  • pinch ground ginger
  • sliced green onions and Sriracha for topping, optional

Instructions

  1. Pierce sweet potatoes several times with a fork. Microwave for 2 minutes, (peel if desired, I didn't) then slice into 1" cubes.
  2. Place all ingredients in your slow cooker and cook on low for 5-6 hours. Remove chicken and shred. Stir all ingredients together and serve. Top with green onions and Sriracha if desired. Leftovers may be stored in an airtight container in the refrigerator for up to 1 week.
3.1
http://www.arismenu.com/crockpot-curry-soup-sweet-potato-chicken-kale/

Filed Under: Dinner, Entree, Gluten-free, Holiday & Seasonal, Paleo, Slow Cooker, Soup · Tagged: chicken, coconut milk, crockpot, curry, dairy free, gluten free, kale, paleo, slow cooker, soup, sweet potato, thai

Honey Roasted Macadamia Butter

December 18, 2013 · by Ari · 14 Comments

Drippy, sweet and melty honey roasted macadamia butter. All it takes is one ingredient and 5 minutes to create your new favorite spread.

Honey Roasted Macadamia Butter

I’m really not the “DIY” type. As much as I love anything homemade, especially when it’s heartfelt, bringing myself to devote hours of time to a craft that I will inevitably be unhappy with when I finish is just not something I can usually do. I am, however, in total awe of people who can/do. Honestly, anyone that can make things look pretty, or at least not look like a kindergartner made it is totally impressive in my book.

Honey Roasted Macadamia Butter

Most of the time when I see a “Beautiful #DIY Gift Idea #Christmas” on Pinterest, I steer clear, and remind myself that the “5 Minute Up-Do” I found took me more like an hour, and I still wasn’t satisfied with the result.

Honey Roasted Macadamia Butter

But food? That I can do. Even DIY food. I love making people treats, especially things you can’t buy in the store, and I adore stuffing my family’s stockings with homemade nut butters, granola, and puppy chow rather than candy canes filled with m&ms.

Honey Roasted Macadamia Butter

So meet my newest obsession. The best, drippiest nut butter I have ever tastes. Now, if you like a more solid texture, not to worry! Stick this baby in the fridge, and you will get more of a traditional peanut butter texture, but I LOVE the way it drips right off the spoon, and has almost a melted texture. Macadamia nuts are the best nuts for spreads, in my opinion. They always come together super easy and quickly with no food processor starting and stopping. This DIY project will literally take you 5 minutes. 10 if you include dishes, but I wouldn’t know since I don’t actually do those.

Honey Roasted Macadamia Butter

I found my honey roasted macadamia nuts at Trader Joe’s, but I’m sure you could also find them online, or make your own!

Print
Honey Roasted Macadamia Butter

Prep Time: 5 minutes

Total Time: 5 minutes

Yield: approx 1 1/2 cups

Honey Roasted Macadamia Butter

Drippy, sweet and melty honey roasted macadamia butter. All it takes is one ingredient and 5 minutes to create your new favorite spread.

Ingredients

  • 16 oz honey roasted macadamia nuts
  • pinch sea salt, optional

Instructions

  1. Place macadamia nuts in your food processor. Blend until a smooth and creamy butter forms, about 3-5 minutes. Taste and add salt if necessary. Store in an airtight container refrigerated for up to one month, or in a cool, dry place for 2-3 weeks.
3.1
http://www.arismenu.com/honey-roasted-macadamia-butter/

Filed Under: Dessert, Gluten-free, Holiday & Seasonal, Sauces & Spreads, Snacks · Tagged: dairy free, diy, gluten free, macadamia nuts, nut butter, recipe, spreads

Drink & Dish: Cornbread Sausage Stuffing {gluten-free}

November 13, 2013 · by Ari · 24 Comments

Cornbread Sausage Stuffing: My family fights over the the leftovers from this stuffing every Thanksgiving! Big chunks of cornbread, sweet Italian turkey sausage, plenty of veggies and herbs and the secret ingredient -- TRUFFLE OIL -- make this a true, unforgettable classic!

Warm and comforting Thanksgiving cornbread sausage stuffing packed with veggies and plenty of herbs, cooked in truffle oil for an extra-special flavor kick.

Cornbread Sausage Stuffing:  My family fights over the the leftovers from this stuffing every Thanksgiving! Big chunks of cornbread, sweet Italian turkey sausage, plenty of veggies and herbs and the secret ingredient -- TRUFFLE OIL -- make this a true, unforgettable classic!

One of my favorite questions to ask people is “What is your favorite Thanksgiving dish?” It says a lot about you, and what you like. I always thought that my favorites were pretty non traditional. It’s actually a tie, and neither of them are dessert! I know, I know, but trust me, I love the desserts too.

Cornbread Sausage Stuffing:  My family fights over the the leftovers from this stuffing every Thanksgiving! Big chunks of cornbread, sweet Italian turkey sausage, plenty of veggies and herbs and the secret ingredient -- TRUFFLE OIL -- make this a true, unforgettable classic!

The first is my mom’s sweet potatoes. Mashed up with cinnamon and topped with melty, bubbling marshmallows. Uggghh, I die. I will only eat them that one day (and a few days after for whatever’s left over, obviously) a year. Food can bring up so many feelings and memories, and those sweet potatoes just feel like Thanksgiving.

Cornbread Sausage Stuffing:  My family fights over the the leftovers from this stuffing every Thanksgiving! Big chunks of cornbread, sweet Italian turkey sausage, plenty of veggies and herbs and the secret ingredient -- TRUFFLE OIL -- make this a true, unforgettable classic!

The other will come as no surprise. This stuffing. My stuffing. I was never the biggest fan of stuffing when I was younger, but once I tasted it, I realized exactly what I was missing. Last year was the first time I made my own. Before then? I was a sucker for the boxed stuff. Whatever, it totally tasted delicious at the time, but it is nothing compared to this gem. My family has been asking for this stuffing since last November. It’s become one of my traditions, and something I hope to pass down someday.

Cornbread Sausage Stuffing:  My family fights over the the leftovers from this stuffing every Thanksgiving! Big chunks of cornbread, sweet Italian turkey sausage, plenty of veggies and herbs and the secret ingredient -- TRUFFLE OIL -- make this a true, unforgettable classic!

I often get caught up in trying new things and experimenting in the kitchen, but there is something so special about creating lasting family traditions. This stuffing is special enough to me that it has become just that. Soft and tender cornbread with perfectly sauteed veggies cooked up in bold, flavorful truffle oil (<–my secret ingredient, and totally worth the splurge!), along with sweet turkey sausage. It could be a meal on it’s own, or a standout Thanksgiving side dish.

Cornbread Sausage Stuffing:  My family fights over the the leftovers from this stuffing every Thanksgiving! Big chunks of cornbread, sweet Italian turkey sausage, plenty of veggies and herbs and the secret ingredient -- TRUFFLE OIL -- make this a true, unforgettable classic!

Obviously, Nicole and I couldn’t let November go by without sharing a Thanksgiving Drink & Dish. Nicole makes probably favorite drink I’ve tasted, like ever–a pumpkin pie martini made with homemade pumpkin pie infused vodka (I mean, come on…). And we both share some time saving tips for the big day.


If you’re still deciding on your menu (or what to bring along to friends and family), this dish is simple, easy, and sure to impress!

Cornbread Sausage Stuffing:  My family fights over the the leftovers from this stuffing every Thanksgiving! Big chunks of cornbread, sweet Italian turkey sausage, plenty of veggies and herbs and the secret ingredient -- TRUFFLE OIL -- make this a true, unforgettable classic!

So tell me… What’s your favorite Thanksgiving dish??

Print
Drink & Dish: Cornbread Sausage Stuffing {gluten-free}

Prep Time: 20 minutes

Cook Time: 30 minutes

Total Time: 50 minutes

Yield: 12 as a side dish, 8 as a main course

Drink & Dish: Cornbread Sausage Stuffing {gluten-free}

Warm and comforting Thanksgiving cornbread sausage stuffing packed with veggies and cooked in truffle oil for an extra-special flavor kick.

Ingredients

  • 1 tbsp truffle oil (can sub olive or coconut oil, but it will not taste quite as incredible)
  • 1 lb sweet Italian turkey sausage
  • 1 large onion, chopped
  • 3 carrots, peeled and chopped
  • 6 ribs celery, chopped
  • 4 cloves garlic, finely minced
  • Generous pinch each salt and pepper
  • 6 cups cornbread cut into 1" cubes (I used gluten-free), about 1 8x8 pan prepared
  • Generous pinch fresh thyme, finely chopped
  • 2-3 sage leaves, finely chopped
  • Handful fresh parsley, finely chopped
  • 1-2 cups chicken broth
  • 4-5 bay leaves

Instructions

  1. Preheat oven to 400. Heat truffle oil in a large skillet over medium heat. Cook sausage until browned. Add veggies and garlic. Season with a generous pinch each of salt and pepper. Cook until fragrant and slightly tender, about 10 minutes.
  2. Transfer to a large mixing bowl. Add cornbread and fresh herbs. Gently toss to combine. Transfer to baking dish. Add 1-2 cups chicken broth. 1 cup will yield a crispier stuffing, while more liquid will create a stickier texture closer resembling box mix. Place bay leaves on evenly around the top.
  3. Bake until cornbread begins to brown and edges become crispy, about 10-15 minutes. Again, less time will yield a softer stuffing.
  4. Remove bay leaves and serve. Leftover can be stored in an airtight container in the refrigerator for up to one week.
3.1
http://www.arismenu.com/drink-dish-cornbread-sausage-stuffing/

Filed Under: Drink & Dish, Entree, Fall, Gluten-free, Holiday & Seasonal, Side Dish, Thanksgiving · Tagged: dairy free, stuffing, truffle oil

Easiest Crockpot Curry Chicken

November 2, 2013 · by Ari · 34 Comments

Bold, flavorful curried chicken in your crockpot has never been so easy–the perfect weeknight meal that anyone can put together.

Easy Crockpot Curry Chicken #glutenfree

Most of the time I truly enjoy cooking. I love being creative in the kitchen, and putting together a bunch of things that make my husband make that face where he raises an eyebrow and the rest of his face gets all scrunchy, only to end up admitting his unfounded skepticism when he tastes the deliciousness that ensues.

Easy Crockpot Curry Chicken #glutenfree

But sometimes getting in the kitchen after a long day sounds like the worst thing everrrrr. This is when I love my crockpot. And even more, I love crockpot recipes that literally require zero effort on my part. If I have to brown meat first, it usually never even ends up happening because that means I actually have to remember to cook at 7am.

Easy Crockpot Curry Chicken #glutenfree

This is the easiest recipe you will ever make. And you want to know a secret? Usually when I make it, I use a bag of broccoli that steams in the microwave and boil-in-a-bag rice. Sometimes I remember to set up my rice cooker which is also super hands off, but I like the option of being 100% lazy.

Easy Crockpot Curry Chicken #glutenfree

As easy and simple as this recipe is, it doesn’t taste like it! The flavors are bold, and it’s one of those dishes where you look forward to eating the leftovers all week long. In fact, sometimes Steve and I even fight about who gets to take them to lunch. 😉

Print
Easy Crockpot Curry Chicken

Prep Time: 5 minutes

Cook Time: 5 hours

Total Time: 5 hours, 5 minutes

Yield: 4 servings

Easy Crockpot Curry Chicken

Bold, flavorful curried chicken in your crockpot has never been so easy--the perfect weeknight meal that anyone can put together.

Ingredients

  • 2 large chicken breasts
  • 3 cups green curry sauce (use gluten-free and/or dairy-free sauces is desired)*
  • Brown rice and steamed broccoli for serving**

Instructions

  1. Place chicken in slow cooker. Cover with curry sauce. Cook on low for 5-6 hours.
  2. Remove chicken from slow cooker and shred. Return to sauce. Serve with brown rice and steamed broccoli.

Notes

*Curry sauce needs to cover chicken. Depending on the size of your slow cooker and chicken breasts, you may need more or less sauce. **I serve about half a chicken breast with 1/2 cup brown rice and 1 cup broccoli. Feel free to alter as desired, or serve with something totally different.

3.1
http://www.arismenu.com/crockpot-curry-chicken/

Filed Under: Dinner, Entree, Gluten-free, Low Carb, Paleo, Slow Cooker · Tagged: chicken, crockpot, curry, dairy free, easy, gluten free, recipe.dinner, slow cooker

Next Page »
Image Map

Popular Posts

Tart Cherry Margaritas: The perfect, refreshing margarita--lightly sweet with a punch of tequila

Tart Cherry Margaritas

90+ Healthy Recipes for Breakfast, Lunch, Dinner & Dessert

90+ Healthy Recipes for Breakfast, Lunch, Dinner & Dessert

The Ultimate Peanut Butter Cup Brownie Cookies: Rich, fudgy, brownie-like chocolate cookies stuffed with melty peanut butter cups!

Ultimate Peanut Butter Cup Brownie Cookies

Drink & Dish: Cafe Au Lait Cupcakes

Crockpot Chicken Enchilada Soup

Subscribe via Email:

Enter your email address:

Save an additional $30 on Blendtec Factory Recertified Blenders + Free Shipping

Featured Here

recipe redux
Certified Yummly Recipes on Yummly.com

Member Of…

FitFluential Is Fitness Found
AZ Bloggers Network
az 150 photo az150_zpsfb093d32.gif

Archives


Image Map

Copyright © 2023 | Innovative Child Theme by The Pixelista | Built on the Genesis Framework


Loading Comments...